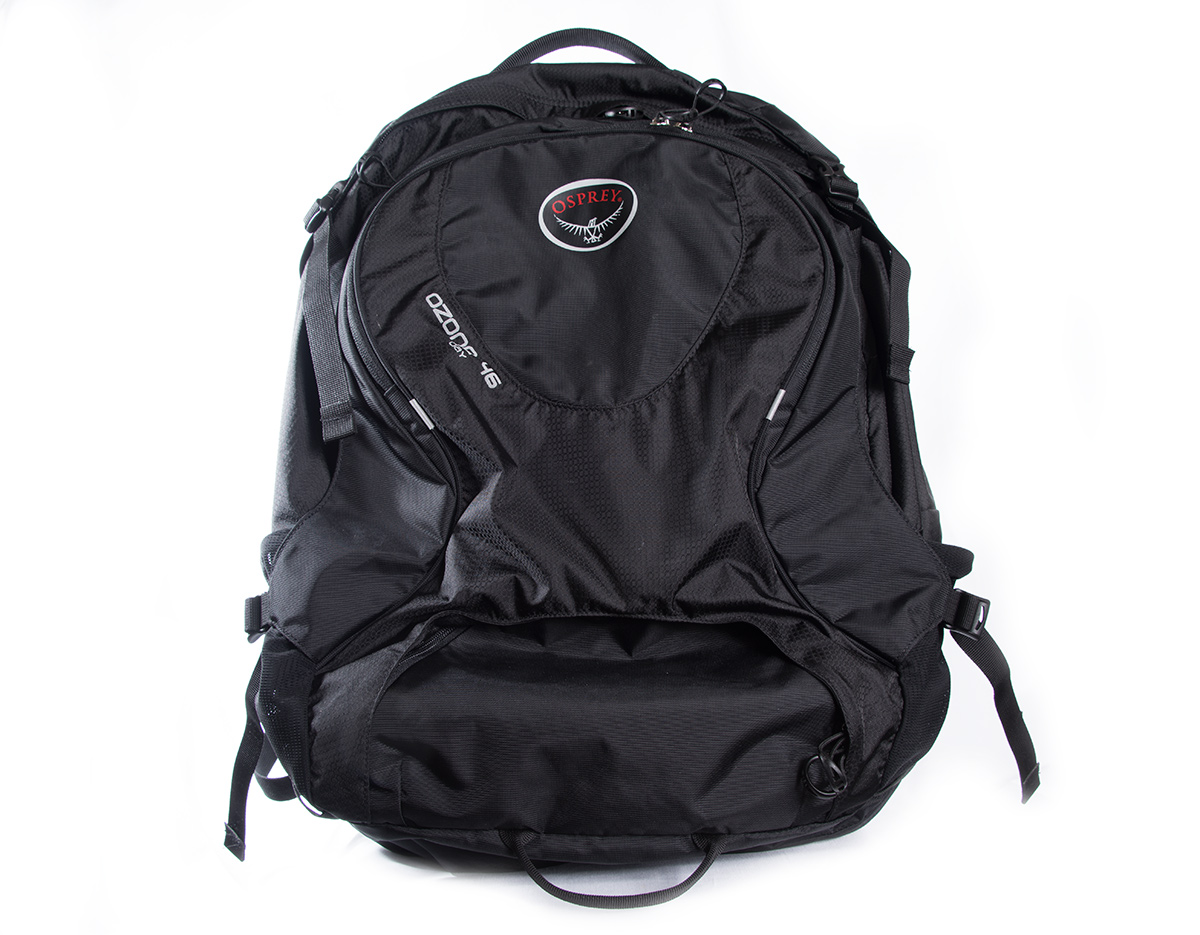
I recently purchased the Osprey Ozone 46 travel pack as an alternative to some other travel packs I had been using, mainly to get a little more space for winter gear.
In the past I had been using a Mountainsmith Parallax camera backpack for most of my travels and it’s worked well. But over the years I’ve started bringing less and less equipment with me and needing more space for clothing and other accessories. The Parallax has about 1880 cu. in. of storage space while the Ozone 46 has 2807 cu. In., so the extra space makes things great for stuffing in things like extra jackets, rain pants, etc. Items that I really had to pin to the outside of the Parallax to get it all to fit.
The Parallax has become my short travel, or day-to-day carry around bag for camera equipment as I still love the padding and customization available with it. And for longer trips, I still use the interior travel case that came with the Parallax for my Nikon D810 camera, I just don’t bring extra lenses or things like that, as I’ve found I don’t use them when doing most of my travel photography.
Construction
The Ozone Travel Pack is made of primarily 210D Nylon with some areas reinforced with 630D Nylon. The overall construction I’ve found to be good. Nothing feels too fragile and thus far I’ve had no issues with ripping, tearing, stitches pulling out, or anything else.
The zippers are YKK, with pull cords, not metal pull tabs (they save weight and work well). I haven’t had any issues so far with zippers getting hung up or anything like that. Also, the main compartment zipper has eye holes for something like a small travel lock. The other compartments only have one zipper or do not have eye-holes for locks.
Storage
The Ozone Travel Pack has 46L or 2807 cu. in. of storage space with the dimensions of 20H x 13W x 12D inches.
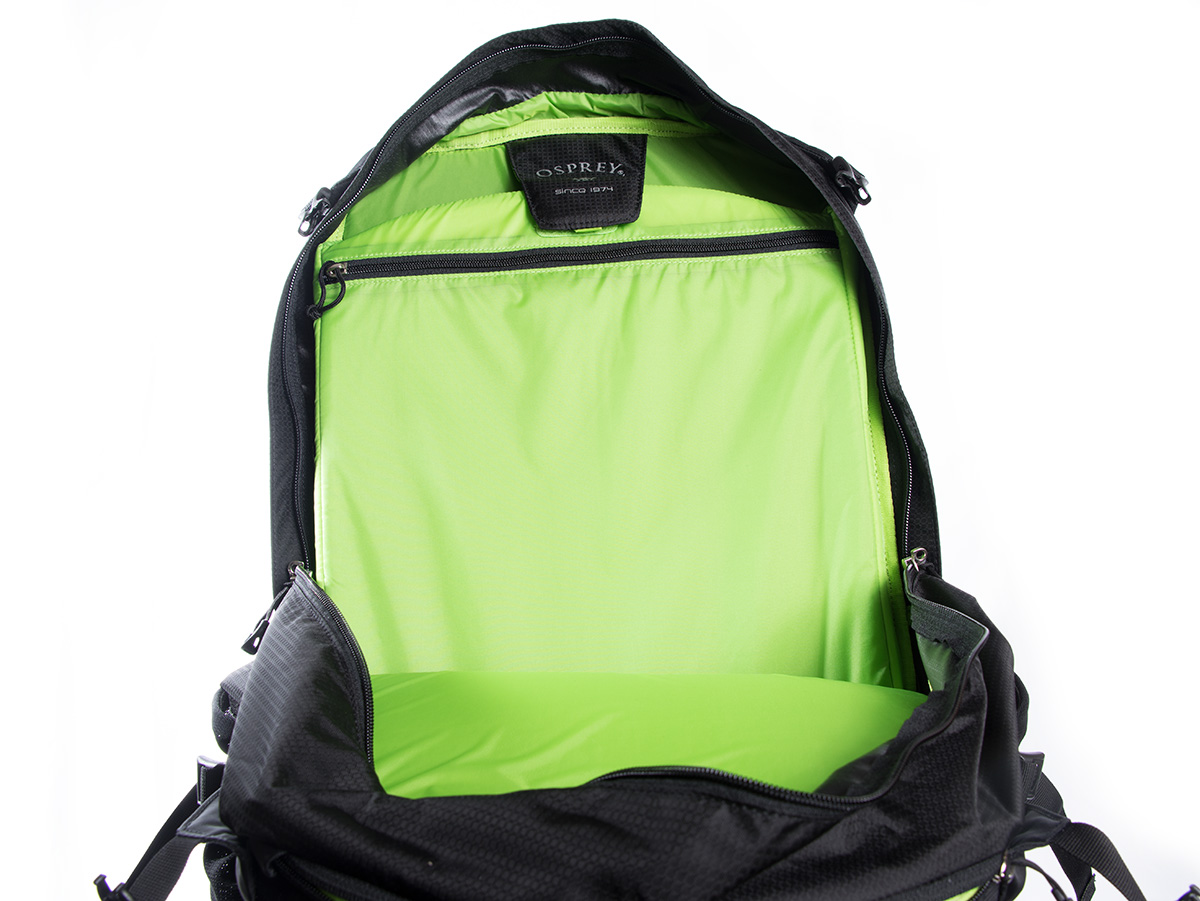
The large main compartment is almost too cavernous, but is able to fit in all the winter clothes that I need for traveling Europe and Nordic countries during the winter months, without hassle… and can still keep the bag as carry on with European flights. Just make sure you know what you put at the bottom, because things can get lost down there pretty easy. That leads into one of the difficulties of the pack is that it’s tough to get to the bottom of the pack, this means that loading it up and getting things out can be a little frustrating at times. But that is something that is pretty standard with top opening bags. You just need to take note to pack things so day-1 you don’t need something at the very bottom.
Inside the main compartment is a laptop pouch. This pouch will hold a 15″ laptop with ease, you may be able to squeeze in a slightly larger laptop, but don’t expect to get your 17″ desktop replacement laptop into the pouch (for more reasons than one). One thing that I’m not sure about the laptop pouch is that it’s on the back of the pack, so everything that you put into the pack will press against it. So if you plan on loading in heavy objects, you may want to make sure where they are positioned in the bag. You can also feel the laptop in the pack a little bit. I’ve used the pouch for my Lenovo Yoga 900, that is 13.3″ and it worked out fine, no damage, etc. But that’s also without really overloading the pack. So the laptop pouch works, but it’s definitely not a shining feature of the pack. It’s there and seems to work, but it definitely leaves some to be desired.
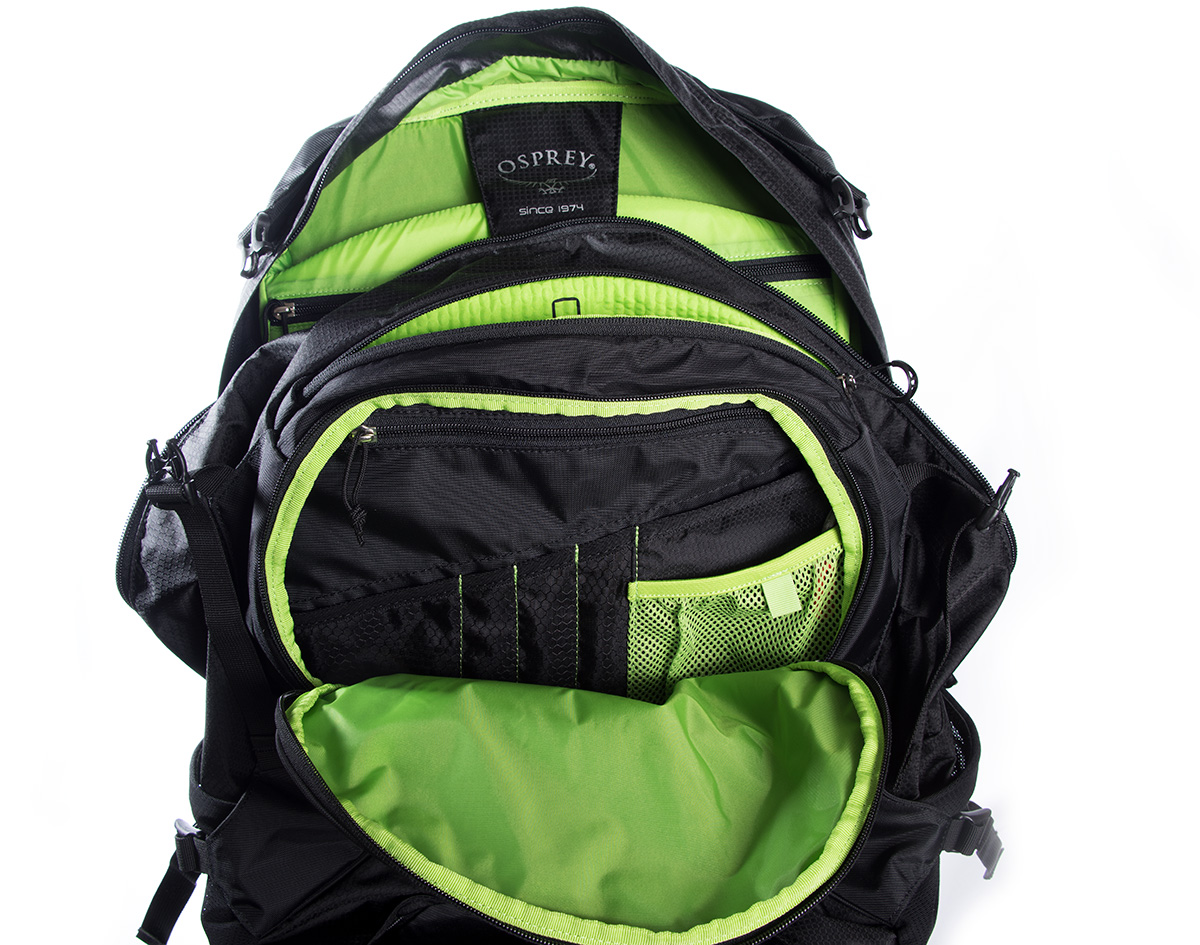
On the top of the pack there is also a tablet pocket that is lightly padded. It’s about 10″ deep at it’s tallest, but will hold anything that is about 8.5H x 9W inches. I don’t travel with a tablet, so i’ve found that this pocket is pretty much only good for paperwork. It has no organizers or dividers. So it’s really just a junk pocket for me.
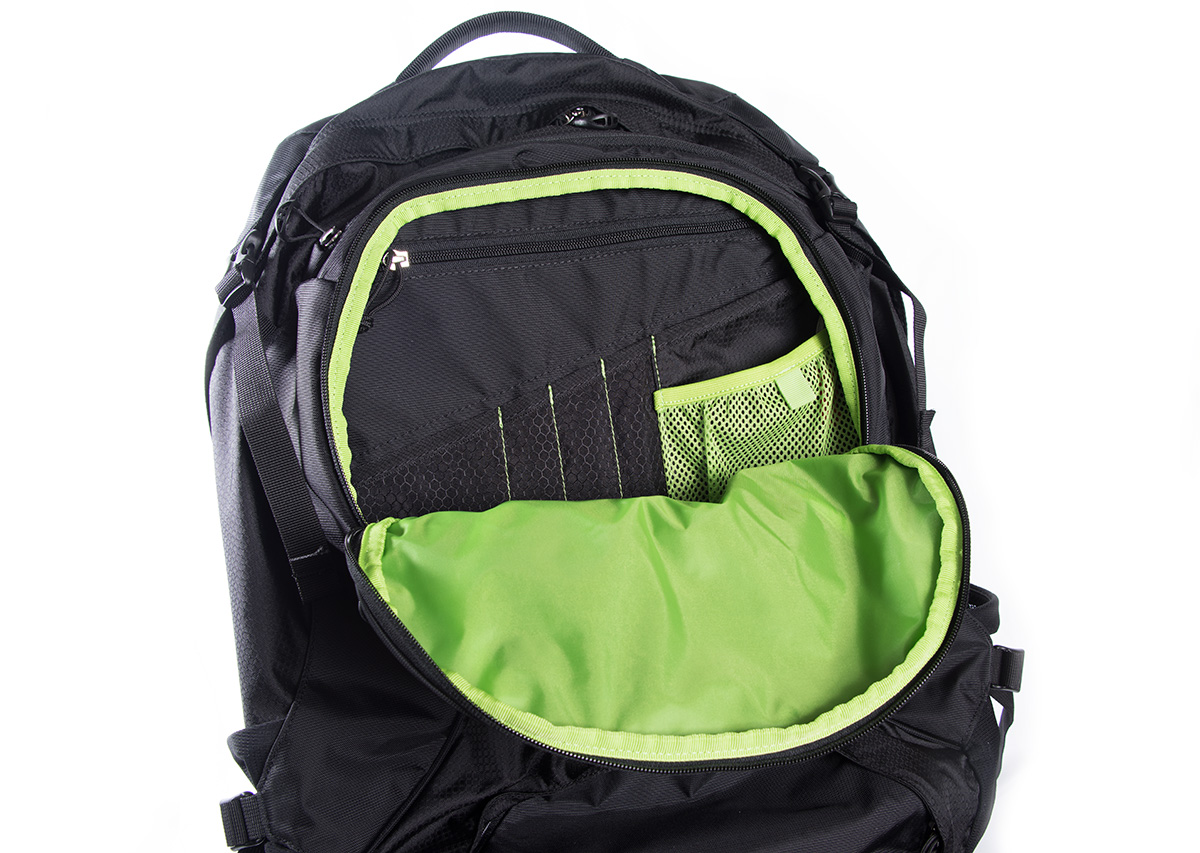
For organization, general easy access and some basic storage, the front compartment has a zippered pouch, pen holders, small mesh pocket, key clip and then just open space to stuff items as needed. The only thing I don’t like about this pocket is that it’s on the outside of the bag, and doesn’t have the same security zippers that the main compartment has. Otherwise, this general use compartment does everything I need it to.
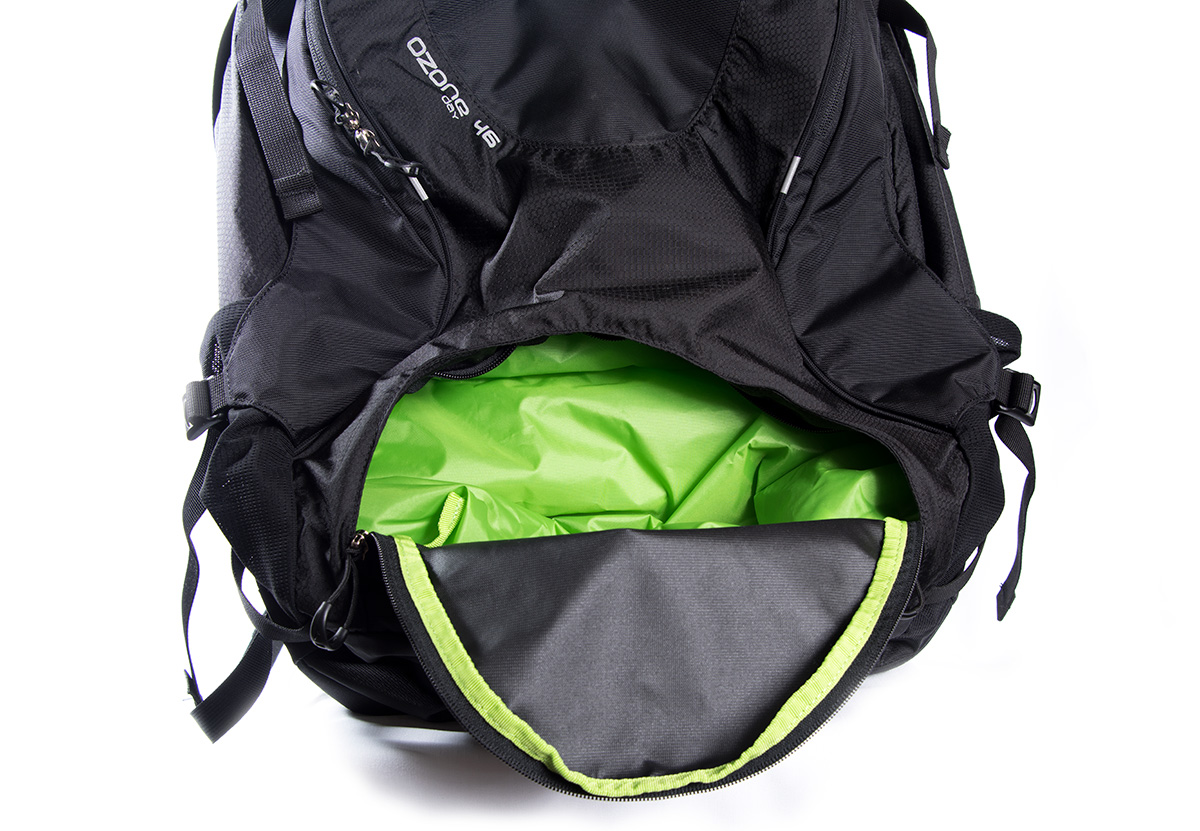
The bottom of the bag also has a small expandable compartment that is good for things like shoes. It also doesn’t latch, and is kind of low on the pack for me to put anything heavy or breakable in there… So I just generally use it to separate dirty clothes from the rest of my bag as needed or to throw in an extra pair of small shoes or sandals.
And lastly, there are two small side stretch pockets, one on either side of the bag, that have side straps that go over them. I use them for water bottles, random small things, etc. A regular size water bottle fits fine in them, but a large refillable bottle doesn’t secure in very well, and because of the side straps that criss cross over them, it makes it a little tough to cram large bottles into the pockets. But otherwise, I haven’t had any issues with them and they are good pockets for easy access.
Comfort & Use
So far, for some shorter trips, the Ozone 46 travel pack has proven to be quite comfortable. To me, it’s actually more comfortable with a little weight in it, it seems to settle in some.
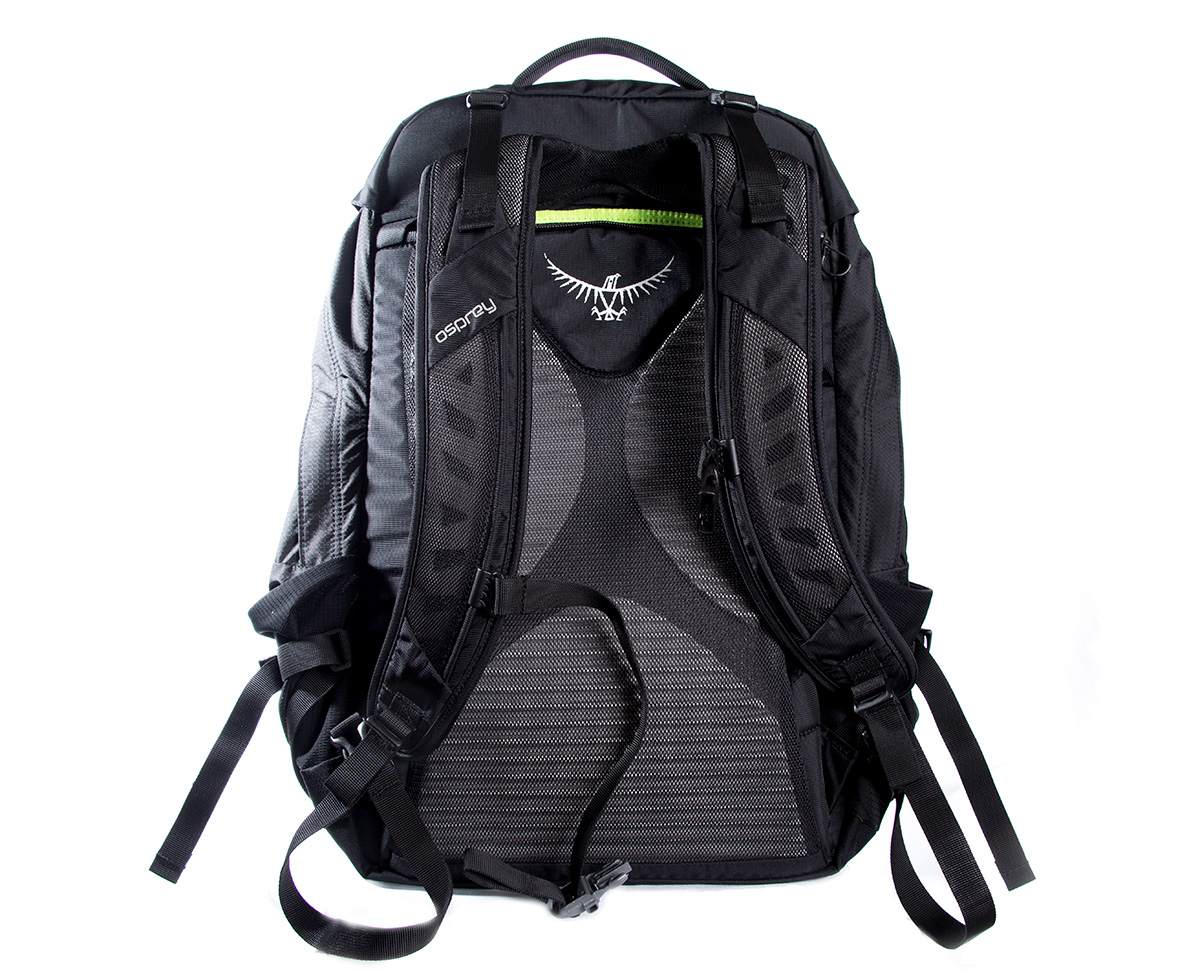
The straps are padded well enough that they don’t hurt, the adjustments give a good range of fit, depending on outer gear, load, and whatever else you might have going on. Also, the shoulder and hip straps all stow away so if you need to check your bag. I’ve found that stowing the hip straps and just using the shoulder straps works well, though, it’s not the most comfortable thing for long periods of time. When stowed they kind of bulge up the bottom of the bag. But it’s a nice feature to have, without a doubt.
Also, if you do stow the straps, there are three handles on the pack, one top one left side and one bottom so you can still easily grab it and go. This has proven quite nice with getting a bag in and out of the overhead storage on airplanes.
Initially I wasn’t sure if the bag would be comfortable enough because the padding looks pretty limited, but, fortunately it has worked out well and I haven’t had any real comfort issues. It did take me a few minutes to get all the straps adjusted to a point that I liked, but after that, it was all easy going… but as you know, with all comfort things, your mileage may vary depending on your frame, the amount of stuff you’re carrying or how you have the straps adjusted.
Final Thoughts
I chose the Osprey Ozone 46 Travel Pack because I wanted a pack that had a little more space than what I had been using, was still easily able to be carried on to flights, and was comfortable to carry around for long periods of time. Thus far, I haven’t been disappointed. The Ozone 46 has been a great travel bag and has made traveling quite easy overall. Using a backpack is so much nicer when going to foreign countries because you can simply put it on and go. It’s so much easier than rollers and other types of bags.
If you’re hauling a lot of electronics with you, DSLR, laptop, video camera, flashes, etc. There are other bags that will work much better. But if you don’t mind using a small extra bag, or are packing light enough to put a DSL on top of your clothes in the main compartment, the Ozone 46 will work out very well. I carry my Nikon D810 with me, but use a Mountainsmith Zoom Medium camera bag to carry my camera outside of my bag, and that holds pretty much everything I need for the camera. The D810 is just heavy, so I like to keep it as separate as possible.
In the end, for longer trips, and short weekend getaways, I’ve found the Osprey Ozone 46 Travel Pack to be an excellent choice.
