I’ve been in need of my own set of digital calipers for a while now, so I decided to take a look on Amazon and see what options I had. There are quite a few options… The Neiko 6 in. caliper was a “best seller” and had good reviews. And for $17, I figured I’d give them a go.
I’ve used many pairs of calipers in the past, mostly non-digital versions. I must say I prefer digital; it’s quicker, easier, and offers more functionality. That being said, if you use dial calipers enough, it becomes second nature. But for myself, who doesn’t use them every day, it’s a pain in the butt.
Read more
Latest Posts
TopBodyArmor.com – IIIA Plates (10×12, Shooters Cut)
In one of my previous posts on body armor, I mentioned that I ordered some IIIA soft plates for my plate carrier from TopBodyArmor.com (via eBay). I just got them in the mail, and here they are.
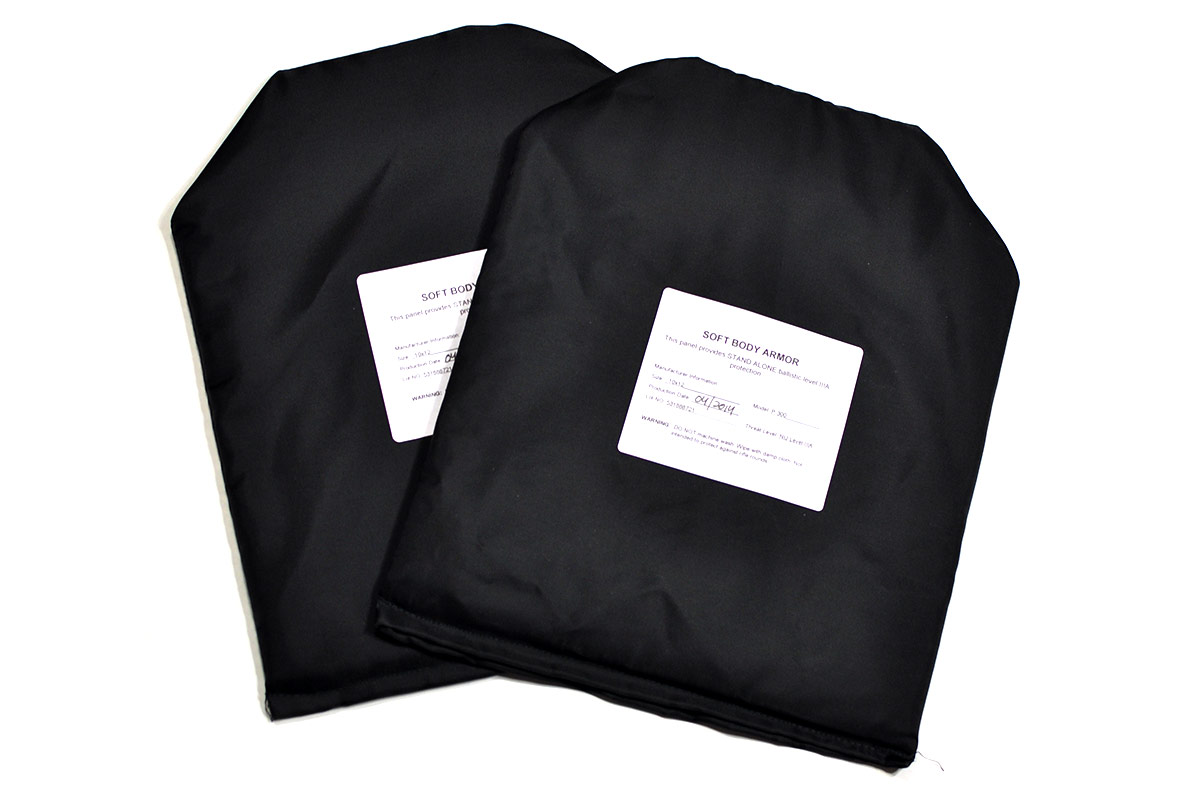
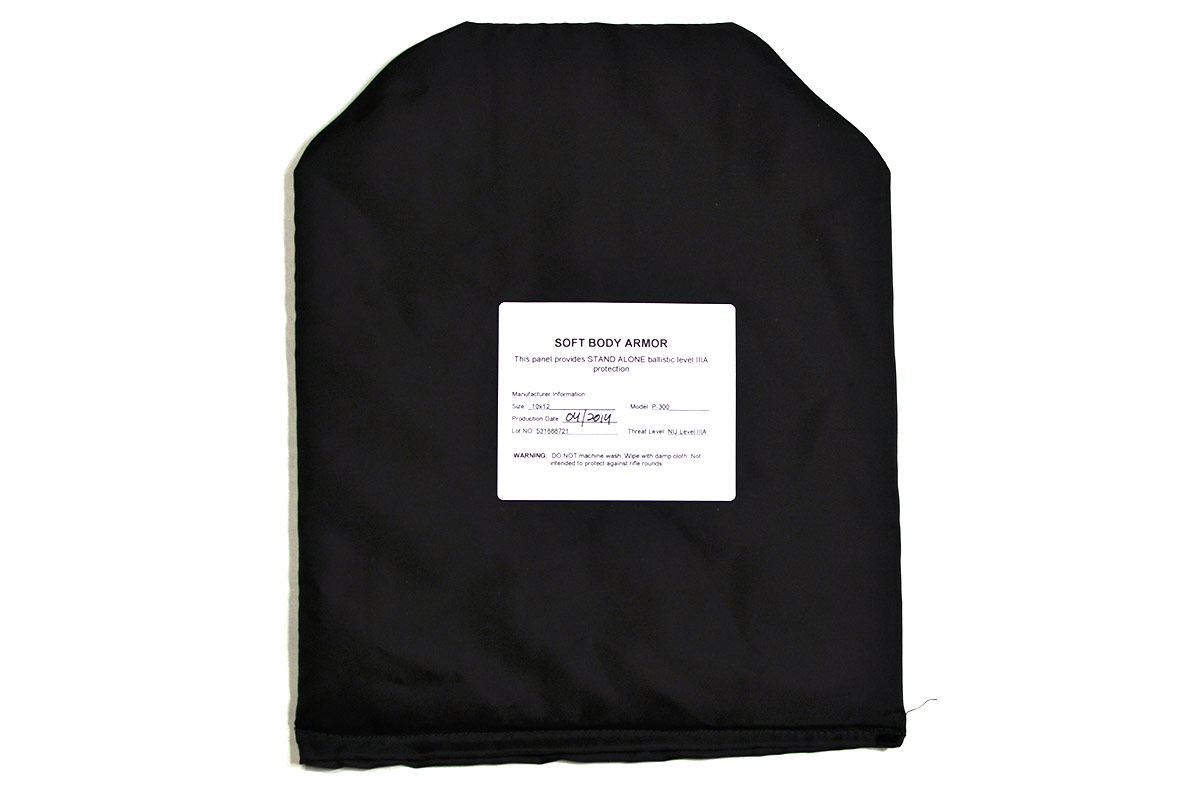
These are the 10 in. X 12 in. plates in the shooters cut profile (the top left and right are cropped to fit the chest better). Many plate carriers out there use this style plate and you need to order the right ones for your carrier, or they wont fit.
There are no major defects that I can see or feel from a decent going over… The plates are covered by a synthetic material that is loosely stitched around what feels like Kevlar® (or some form of UHMWP material). What these are actually made out of is not listed on the website or on the product its self. Also, these are NOT NIJ certified. They are “tested to NIJ levels” but not certified (so the company tells me).
The plates measure in at 0.317 in. (8.07 mm.) thick and are 9 7/8 in. x 11 15/16 in. (W x H). So they are very close to the as advertised size (10″ x 12″). And they weigh in at 1 lb. 1 oz. and 1 lb. 0.8 oz. I’m not sure where the discrepancy in weight is from, but it’s so slight it probably has something to do with minor size differences, or something along those lines; it’s hard to tell. With both plates in my Velocity LWPC and no other kit attached, it weighs in at 3 lb. 15 oz.
Read more
Body Armor – A Little Information
Over the past couple weeks I have been hunting down some body armor; certain ranges (many police ranges for example) require it, and it’s something that I like to wear during firearms training classes. You should train as you fight, with the appropriate gear; you don’t want to cheat yourself. You need to know how to move and react with your gear. That being said, any type of body armor for your local public shooting range is probably a bit overkill. If you feel you need armor at your public range, you might want to consider finding a different range. One of the reasons I tend to avoid my local ranges.
In all honesty, I could probably get away with not having any armor at all, this isn’t a war zone… I could borrow when needed, etc., but I got a little fixated on the process and having my own gear. I ended up finding some pretty good deals, or what I consider a good deal, on some new equipment. I’m going to try to outline a bit of what I learned along the way, and hopefully that will help someone if they are looking to buy something.
The first realization I had in the shopping process is that there are a lot of options. Different styles, shapes, colors, protection levels, and brands. Trying to jump through all of that and figure out what to get was a pretty mind bending process. I was mostly looking at concealable vests, I ended up finding more than that, but that was what I originally set out for.
Protection Levels
There are a few protection levels for concealable vests and body armor in general, the standard levels described by the NIJ (National Institute of Justice) are IIA, II, IIIA, III and IV. If your interested in reading the full NIJ standard, it’s available here. The information listed in the table below gives a basic outline of what the NIJ uses for testing each protection level.
| Level | NIJ Testing Calibers | Protection Calibers (Examples, not NIJ listed) |
|---|---|---|
| IIA (2A) | 9mm New: FMJ; 124 gr; 1225 ft/s Conditioned: FMJ; 124 gr; 1165 ft/s .40 S&W New: FMJ; 180 gr; 1155 ft/s Conditioned: FMJ; 180 gr; 1065 ft/s |
.22 LR; .380 ACP; 9mm; 40 S&W |
| II (2) | 9mm New: FMJ; 124 gr; 1305 ft/s Conditioned: FMJ; 124 gr; 1245 ft/s .357 Magnum New: JSP; 158 gr; 1430 ft/s Conditioned: JSP; 158 gr; 1340 ft/s |
.22 LR; .380 ACP; 9mm; 40 S&W; .357 Mag |
| IIIA (3A) | .357 SIG New: FMJ FN; 125 gr; 1470 ft/s Conditioned: FMJ FN; 125 gr; 1410 ft/s .44 Magnum New: SJHP; 240 gr; 1430 ft/s Conditioned: SJHP; 240 gr; 1340 ft/s |
.22 LR; .380 ACP; 9mm; 40 S&W; .357 Mag; .44 Mag |
| III (3) | Rifle 7.62mm* New: FMJ; 147 gr; 2780 ft/s Conditioned: FMJ; 147 gr; 2780 ft/s |
.223; 7.62×39; .308; 7.62×51 |
| IV (4) | Armor Piercing Rifle – 7.62mm AP* New: AP; 166 gr; 2880 ft/s Conditioned: AP; 166 gr; 2880 ft/s |
5.56 AP; 7.62×39; 7.62×51 AP; 7.62x54R; 7.62×63 AP |
The general rule of thumb that I’ve been told, multiple times, is that whatever level of protection you wear, it should be able to protect against your duty load. So if you are a police officer, your vest needs to be able to stop whatever round you carry in your sidearm.
But, in 2012, the FBI reports, “none of the officers were killed with their own weapons.”[3]
There are many aspects to the NIJ tests, as an example, there is a test called the “Backface Signature” (BFS) test; this is the depth that a projectile indents a testing medium when it hits the armor. It’s the basic deformation of the vest into you when shot. The NIJ states a maximum of 44mm (1.73 in) for all protection levels. Most commercial vests that I’ve seen have had BFS measurements in the 30-38mm range. This is another specification you can use when comparing different options, if you need some more scientific information. If you want a whole lot of scientific information about testing, check out the NIJ Standard-0101.06 (Ballistic Resistance of Body Armor) testing specifications, you can really nerd out on it all if you want.
The NIJ also has a 0115.00 Standard for Stab Resistance. This is a rating that is used to rate protection from stabbing from knives or other sharp objects. Many vests say they are “stab resistant” but are not actually NIJ rated; the NIJ rates armor stab protection using Level designation of 1, 2 or 3. The table below outlines the ratings and the basic stab test parameters.
| Protection Level | Strike Energy (E1) | Overtest Strike Energy (E2) |
|---|---|---|
| 1 | 17.7 ft. lbs. (24 J) | 26.6 ft. lbs. (36 J) |
| 2 | 24.3 ft. lbs (33 J) | 36.9 ft. lbs (50 J) |
| 3 | 31.7 ft. lbs. (43 J) | 47.9 ft. lbs. (65 J) |
The NIJ document outlining all of the details for the Stab Resistance testing is available, here. So if you find a vest that is stab rated, you will know what that rating actually means, to one degree or another.
Generally, concealable body armor only offers up to the IIIA protection level, for things like level III and IV, you usually have to add things like ceramic or steal plates. Something like a plate carrier is usually used for these, and they are not really “concealable”; ceramic plates can be quite thick. Also, to meet a lot of the testing standards, many level III or IV plates also require a plate backer. This is due to the ceramic plates cracking and breaking apart after impact. AR500 steel plates have become very popular for level III and IV protection online, most of these tout that they are tested to NIJ levels, but are not actually NIJ certified. You can buy AR500 plates online for around $60 USD and up from places like ar500armor.com. A major concern of mine about AR500 style plates is spalling; many companies offer anti-spalling coatings, etc. But you should definitely do some research before purchasing anything as it is a widely unregulated market.
Read more
Vortex Optics: RANGER 1000 RANGEFINDER
I recently got my hands on a Ranger 1000 Rangefinder by Vortex Optics. I’ve played with these in the store and used similar range finders that friends have owned, but out of all of the rangefinders I’ve used, I keep going back to the Ranger 1000. The ergonomics are great, it’s very compact and light, and it’s accurate.
The ergonomics of the Ranger 1000 are great, and it allows for easy one handed operation, something that is great if you are also carrying a rifle when out hunting, etc. Along with the great ergonomics, the Ranger 1000 is also fully o-ring sealed, so it’s very water resistant.
Included with the rangefinder is a nice carrying case that will attach to a 2″ or smaller belt. The case has elastic on the sides, it pinches the rangefinder, so even if you forget to clip it closed, it’ll take some serious moving around for it to fall out of the case. It also has a belt clip directly on the side of the rangefinder, so you can simply clip it to your belt; the clip can be moved to either side of the range finder. Also included in the box is a lanyard, a field reference card and the required CR2 3v battery.
With everything in the case, the battery in the rangefinder and the lanyard attached, the whole package weighs in at 9oz and measures 3.5 in x 4.25 in x 2 in (L x W x D). So a pretty small and light weight package.
Read more
Hydro Dipping – A little trial and error…
First and foremost, I am not an expert in the topics discussed below, I’m an enthusiast who is learning along the way…
I recently took up some interest in doing some hydro dipping of some guns, firearm accessories, and various other gizmos and gadgets I have laying around the house…
Hydro dipping is also called hydrodip, water transfer printing, water immersion printing, hydrograghic printing, hydro imaging and fluid imaging. All of these things refer to the same processes.
One thing I quickly noticed is that all of the at-home DIY kits (that I could find) used funky generic versions of patterns, and just were too small scale for what I was really looking to do…
So, what did I do? I opened up a business account with the main company that is licensed for patterns such as MultiCam and Kryptek and placed some orders for the basic materials to get started. It wasn’t a huge investment, but it definitely was a lot more than a DIY kit; and it required things like automotive paint guns, an air compressor and of course space to actually paint things with a large volume paint gun, etc. Fortunately, I have or have access to most of the required space and materials; but I definitely had to make some investments in the painting and chemical department ($300.00 and growing daily).
Battle Arms Development – Ambi Safety Selector (B.A.D.-A.S.S.)
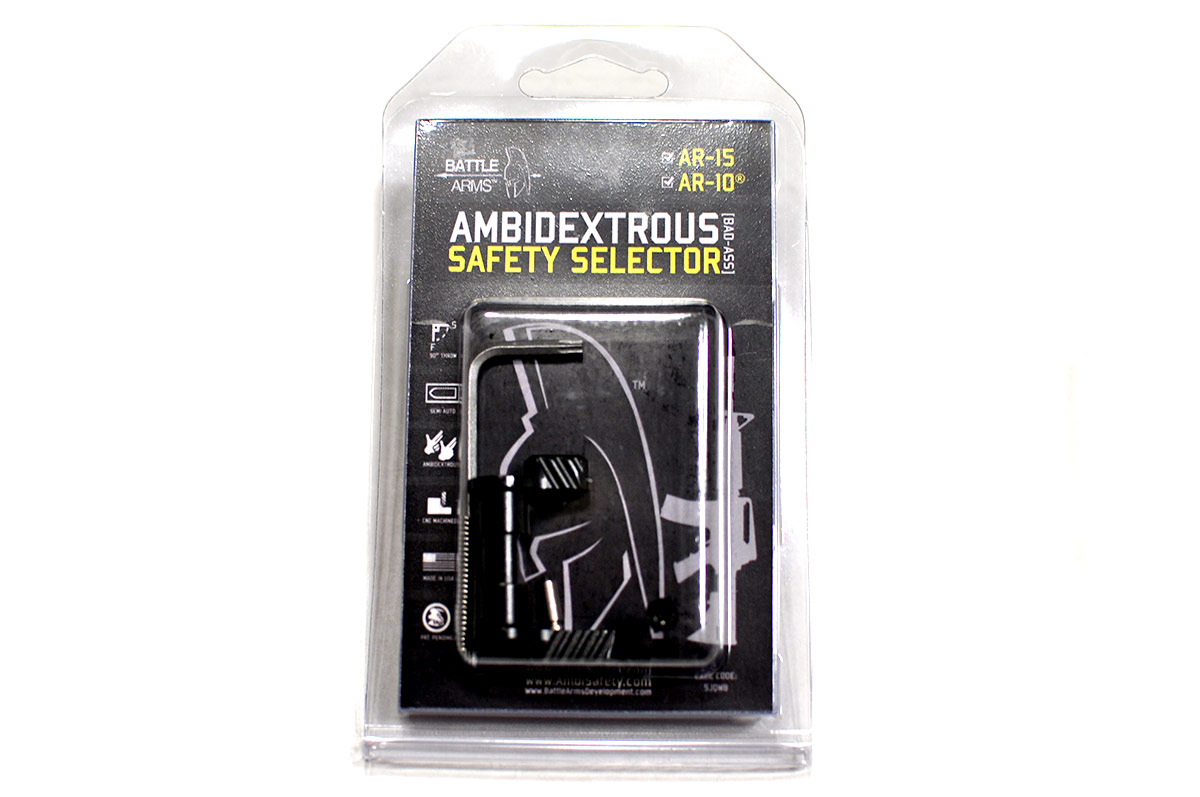
For my next AR-15 build out, using the BCM-KMR-13 rail that I recently picked up and one of my Coronado Arms lowers, I wanted to go the ambidextrous route with the safety selector. After doing a little digging around, the Battle Arms Development – Ambidextrous Safety Selector (BAD-ASS) looked like a good choice, and was priced well ($52.00 on Amazon).
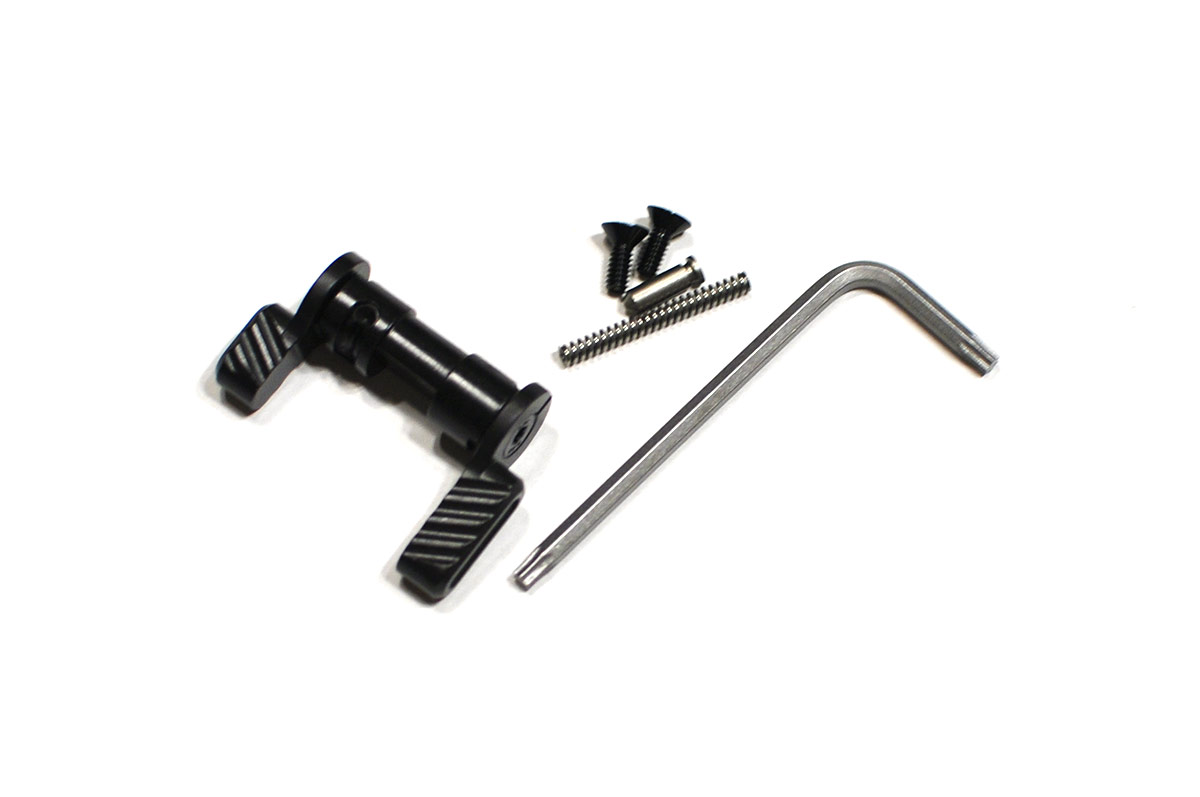
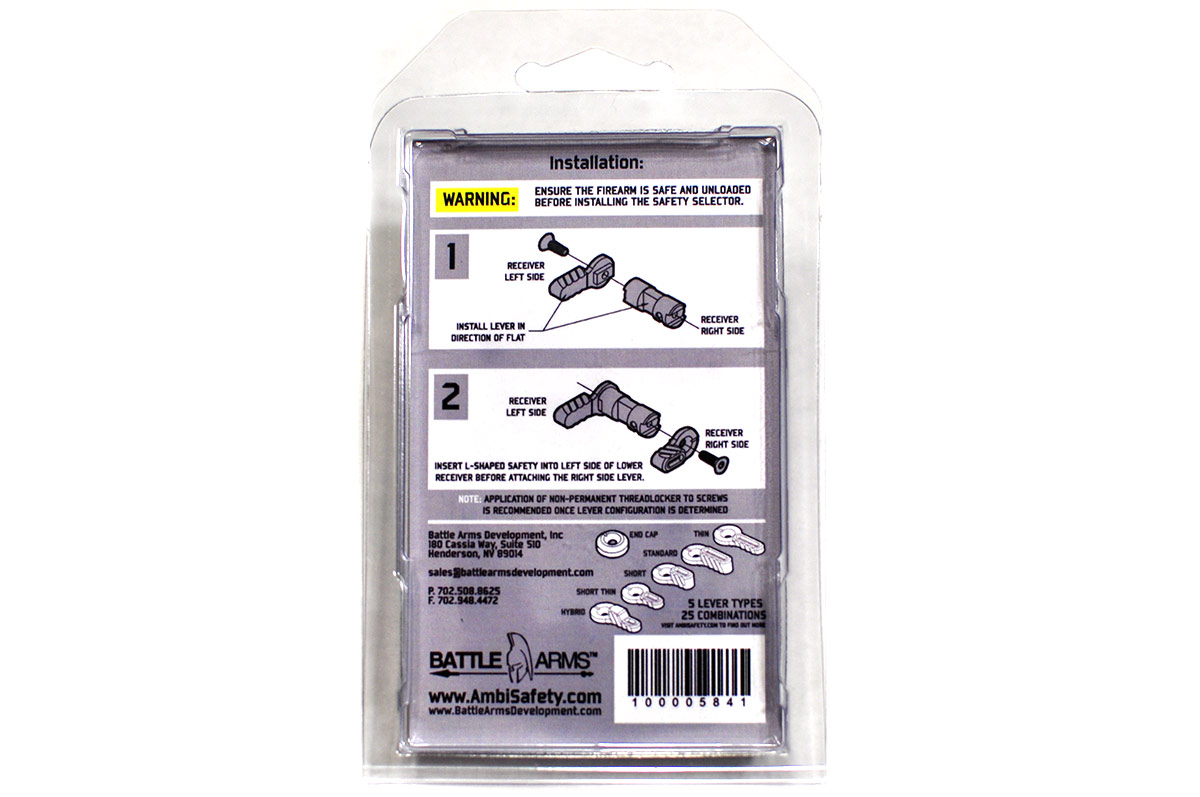
The selector I picked up is a standard 90 deg throw selector with the standard levers (one standard and one short lever). They offer 5 different types of selector levers (Hybrid, Short Thin, Short, Standard, and Thin) and can be “configured in 25 combinations”. They also make a short throw version, but I haven’t had any experience with them. If you want to see the different lever types, check out Battle Arms’s website.
I got the selector in the mail and it was a simple install, as expected. If you’ve never installed a new selector before, it’s a pretty simple process (short list of basic instructions below)…
- Make sure your AR-15/10 is unloaded and safety checked.
- Remove the pistol grip which holds in the selector detent and spring. Then remove the detent and spring.
- Remove the selector by sliding it out the side of the lower. You may have to wiggle it around a bit to get it to clear the trigger assembly.
- Remove the right side (short end) selector lever from the ambi selector.
- Slide in the selector the same way you removed the old one, usually it goes in the easiest when angled towards the safe position. You will probably have to wiggle it around a bit to clear the trigger assembly.
- Once the selector is in place, attach the right side selector lever and then make sure the selector moves freely and you can check the trigger, etc.
- Reinstall the detent, detent spring and the pistol grip.
- Function check the trigger, safety, etc.
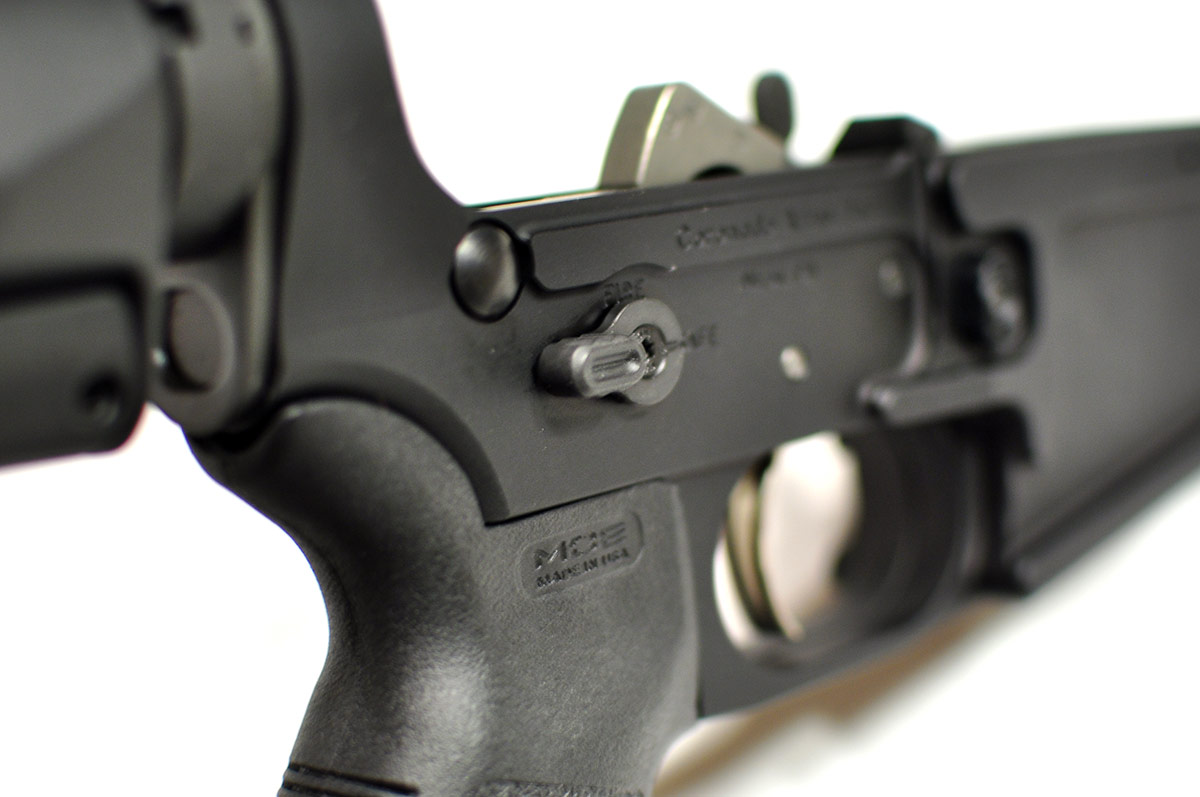
Overall, I like the selector. It feels very well made; it is CNC machined and made in the USA. The levers are smooth and rounded but have notches cut into them; the notches provide sufficient grip to easily operate the selector without slippage. The selector movement itself is a little stiff, but it’s getting smoother the more I use it. I put a little oil on it and it’s working in nicely.
Using the selector on the weak side is a little tough, it’s definitely doable, but it’s not easy; if you’ve ever tried to do manipulation weak handed, it takes practice, practice and more practice. So over time, I’m expecting the movement to get easier and easier. You have to make sure you press the lever at the correct angle, etc. Once you do, it snaps pretty quickly and easily.
The short lever doesn’t interfere with my shooting hand when in the fire position. If you have smaller hands you may have some issues and want to get the “thin short” lever; it should eliminate any interference issues. In reality, you may want to look into the thin short lever for the weak side just to eliminate the possibility of any interference. But that being said, you still need to make sure you can manipulate the selector, so make sure you try it out and practice with it.
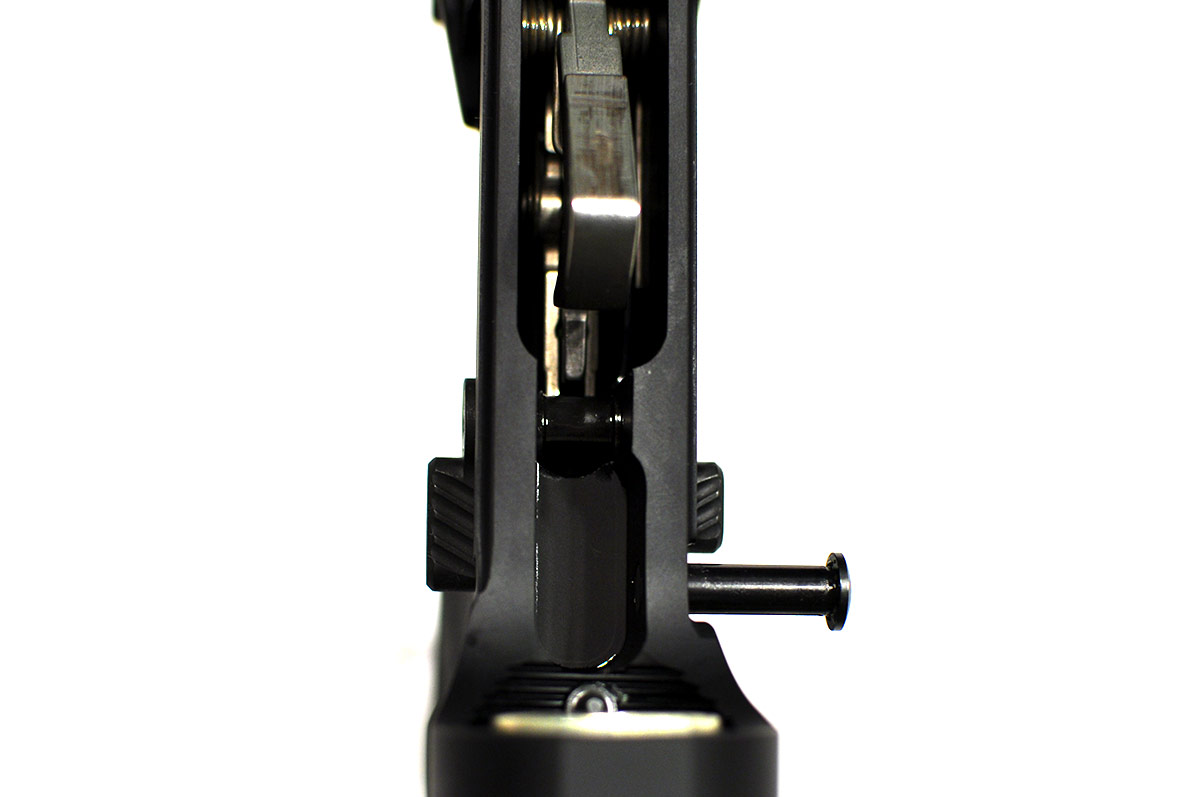
Another thing I noticed is that the back of the selector levers are flat (not notched out) so if you have a grip that is thick, like a Hogue or some other oversized pistol grip, it may interfere with the selector. The grips I’ve tried out have been all Magpul grips, and they seem to work without any issue. So, if your pistol grip sticks out past the side of your lower, then you may have some interference issues.
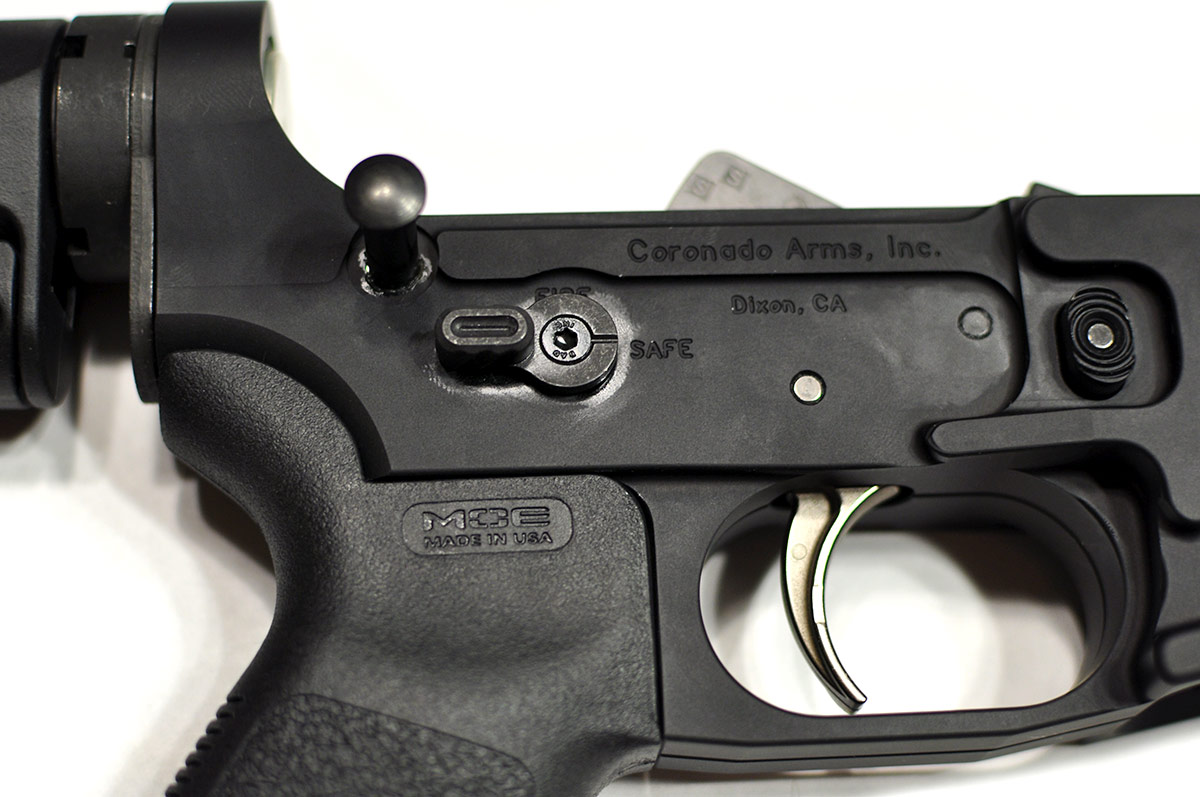
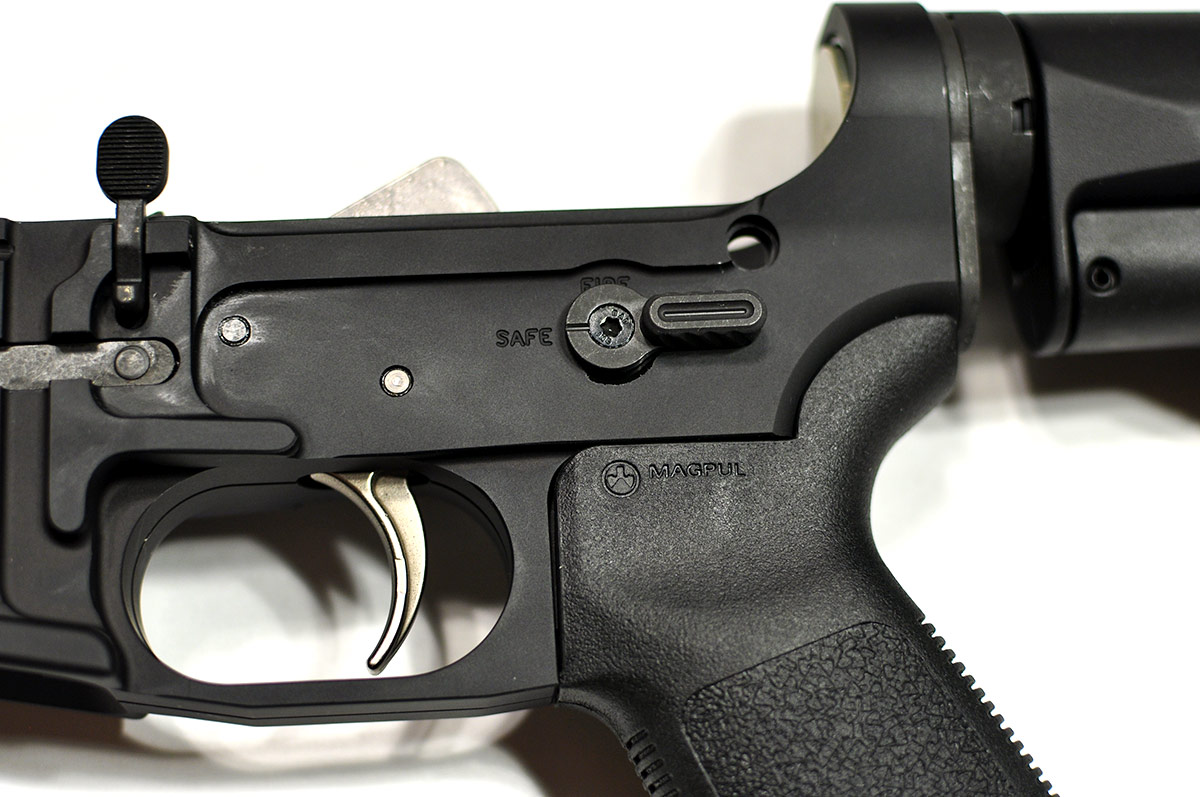
Check out the slide show below to see what the selector looks like installed in my Coronado Arms lower.
If you want to pick up one of these ambi selectors, you can order one from Amazon, or from many online retailers.
Buy Now
If you have one of these selectors, let me know how you like it!
McNett Microfiber Towel
At a recent gun show, the McNett distributor gave me a large microfiber towel package to try out. I was excited to have a compact towel that I could take with me when traveling or backpacking, as it always seems like I’m fighting for space to have a towel with me, or I just don’t bring one and wish I did.
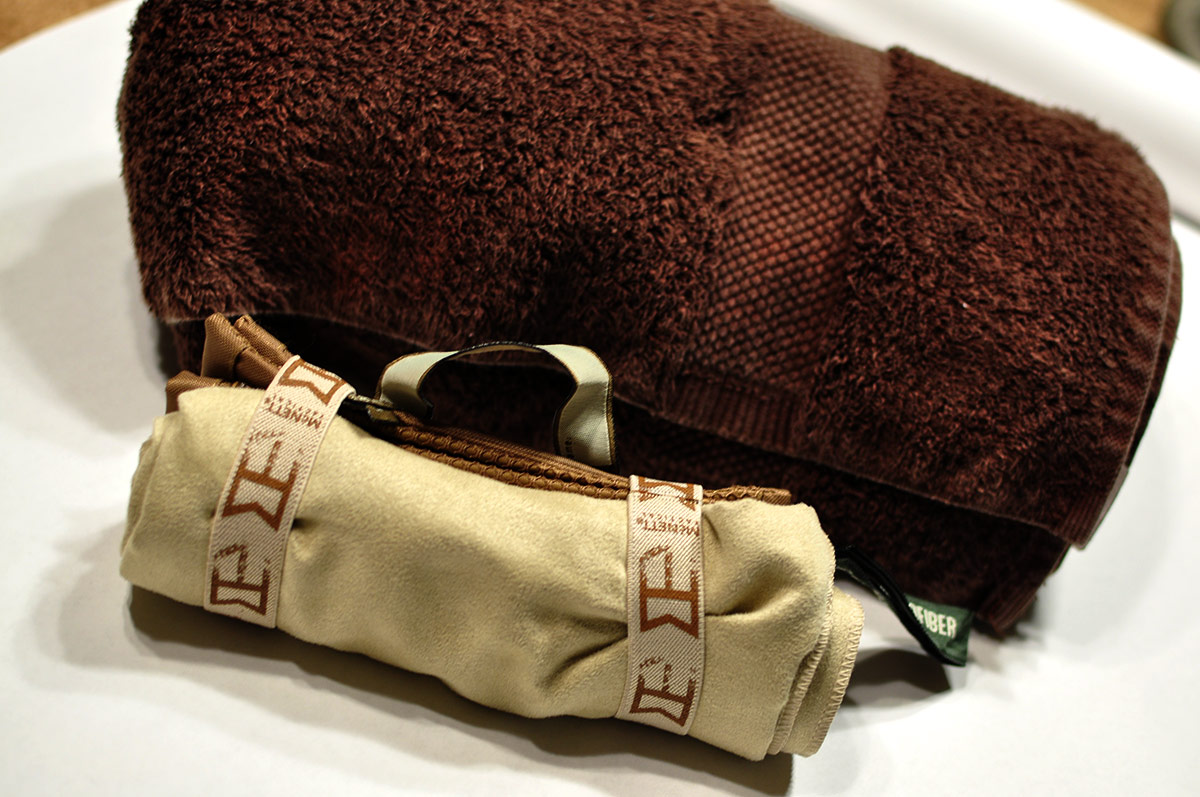
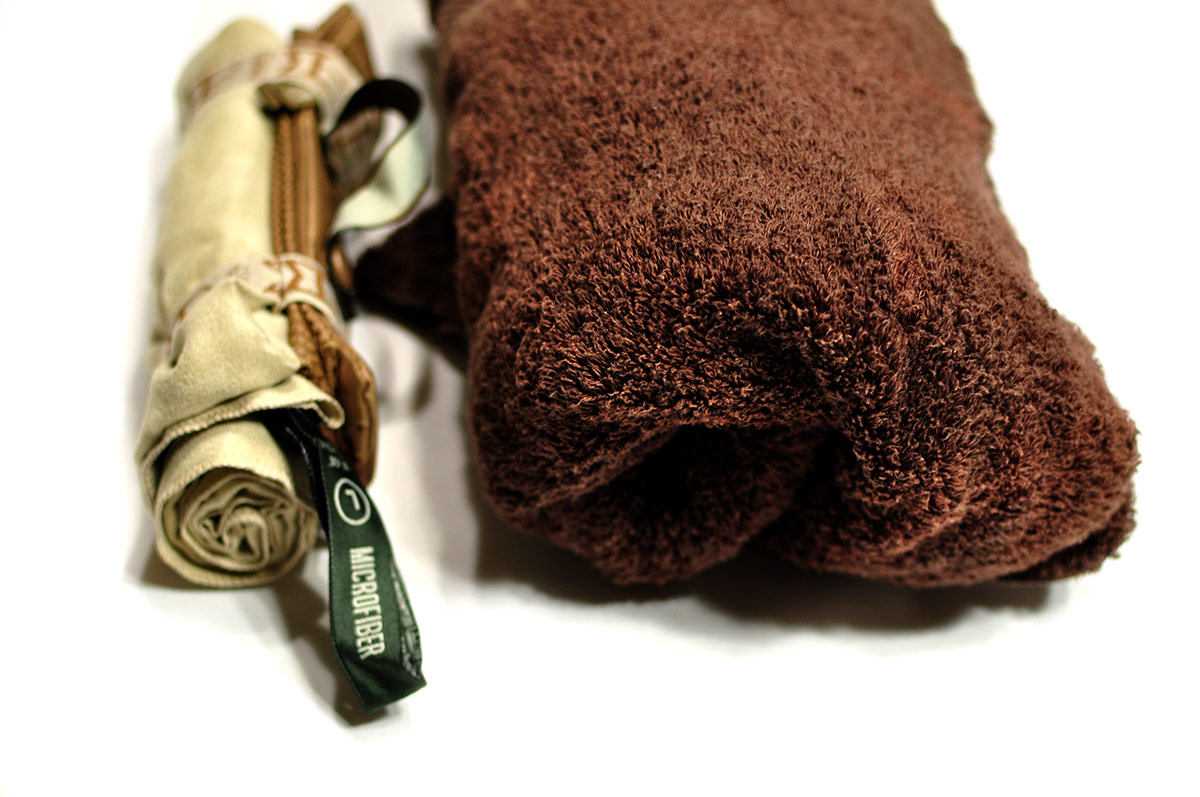
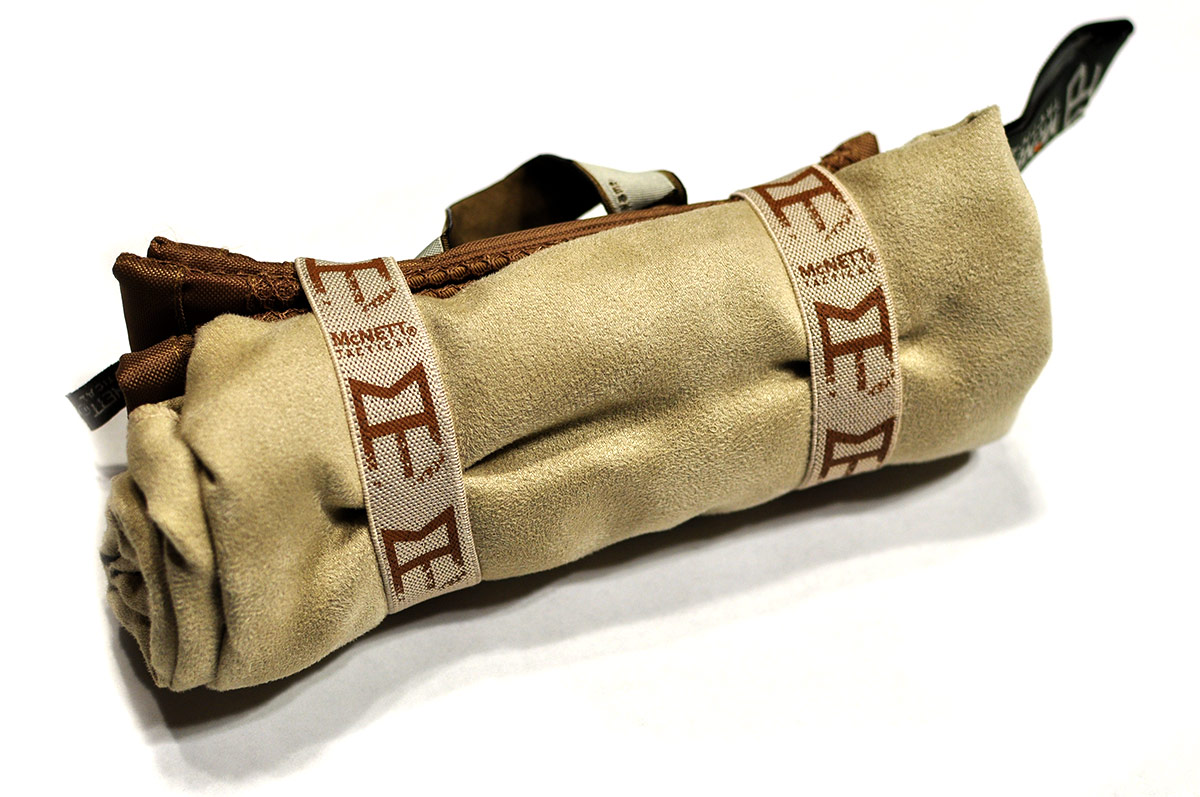
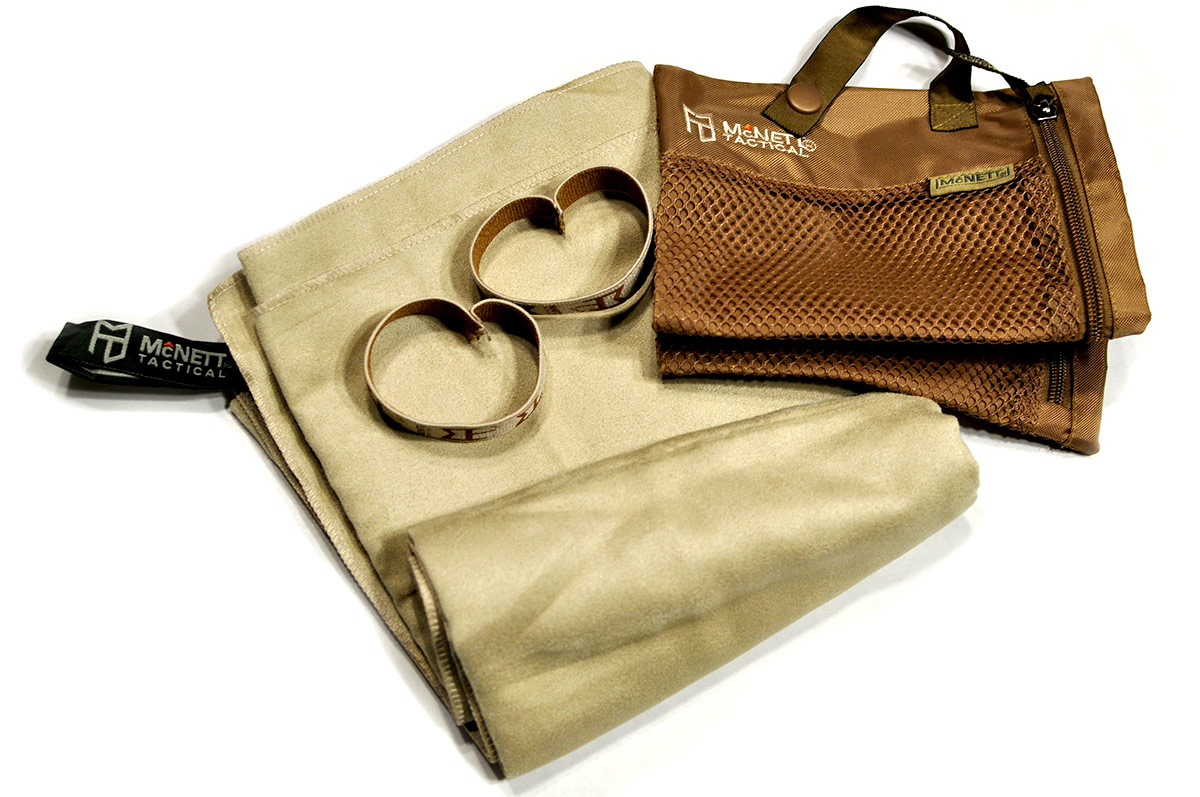
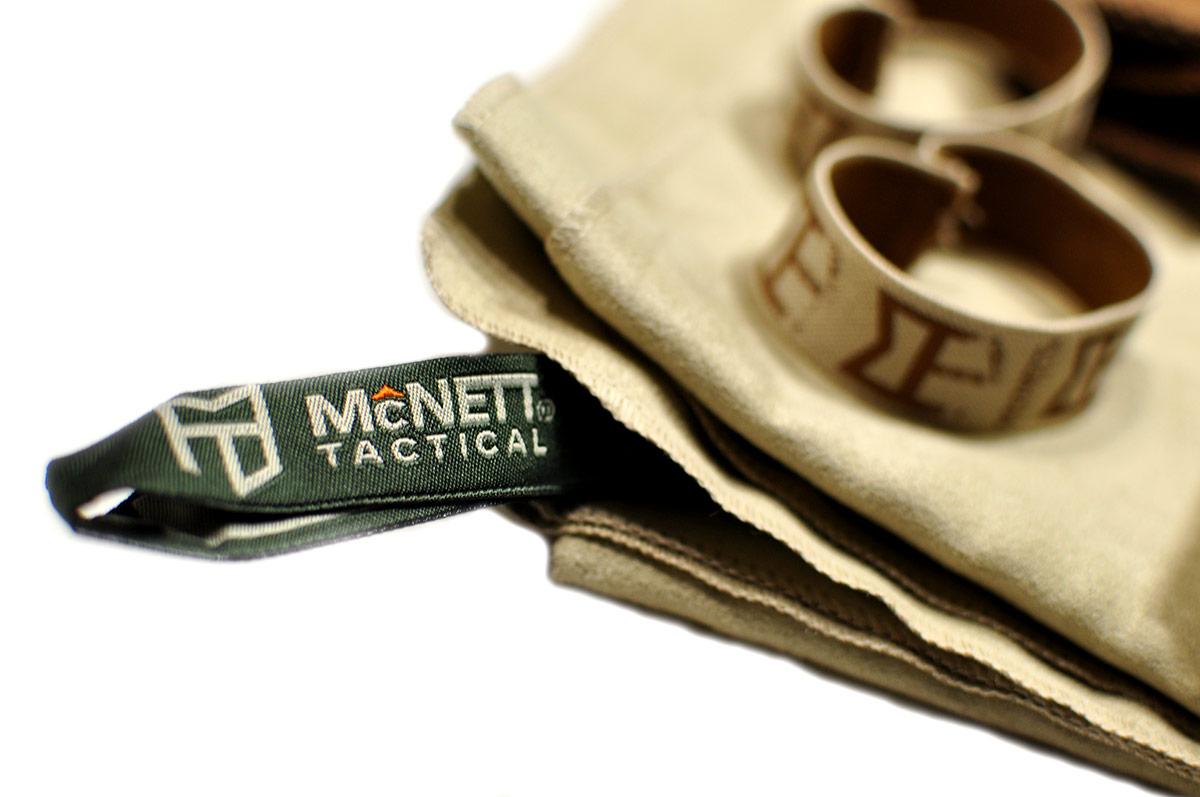
The package I received is the large towel, in sand color (30″ x 50″, the size of a standard bathroom towel) weighing in at 5.8oz on my scale (they report that it weighs 6.4 oz on the packaging). The whole kit, including the towel, 2 straps and a cosmetics bag weighed in at 8.0 oz. Just for the sake of comparison, I grabbed one of my bathroom towels, of the same size, and it comes in at 1 lb 8.6 oz. Substantially heavier than the McNett towel.
The McNett towel, when rolled up with the cosmetics bag measures in at 8.5″ x 2.5″ x 2.5″ (L x W x H) and you could probably compress it down more if you need to, this was just rolling it up and taking the measurements. This makes for a tiny package, a normal towel, the one I weighed before, measures in at 13.5″ x 5.5″ x 5.5″. Much larger then the McNett package.
I’ve used the towel a couple of times, and so far it has proven to be quite durable and very absorbent, more so than most of my normal towels actually. So it will definitely work well out camping, or even if you are at a friends house that doesn’t have any extra towels (we all know that guy). It’s also a great addition to the gym bag.
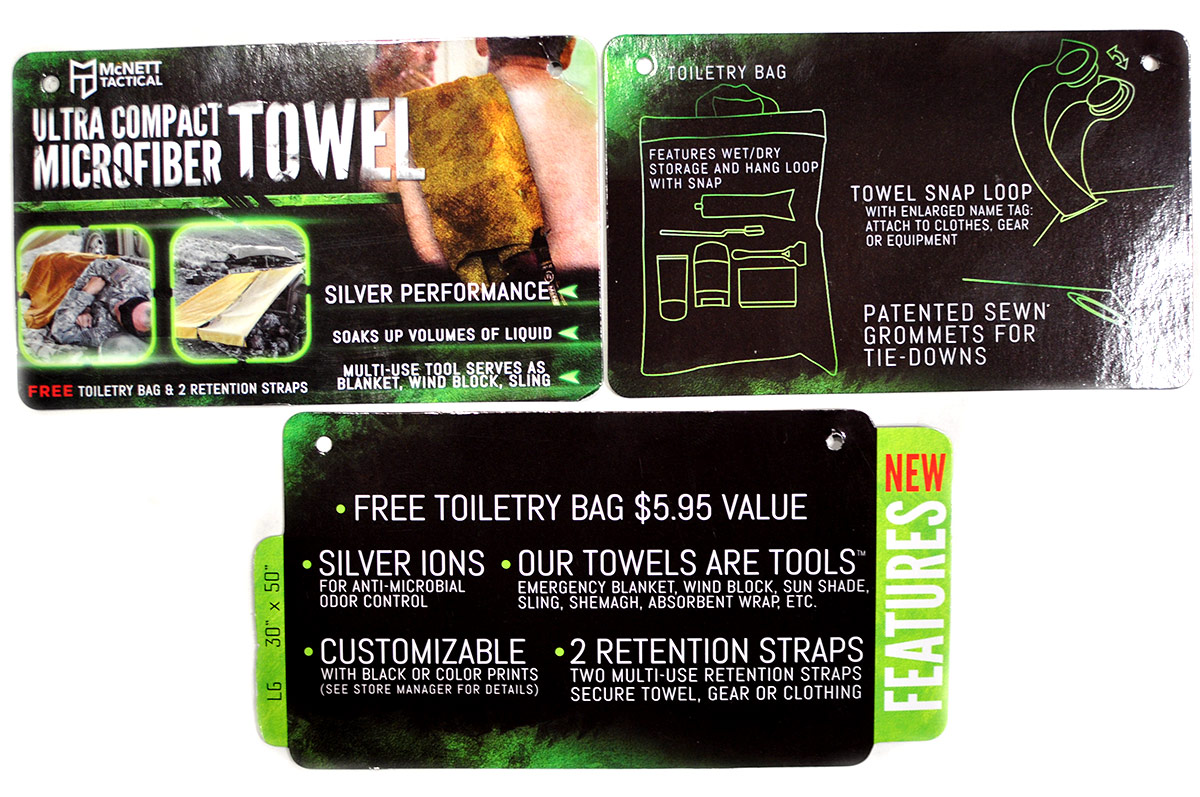
McNett also lists on the packaging that you can use the towel for more than just a towel, for example, a blanket, wind block (for a shelter, etc.), or a sling. I’m sure you can probably come up with more uses for it as well.
This towel is now mandatory gear and goes with me in my camping gear and in my back pack for long hikes. It’s worth the extra weight, and it doesn’t take up much space. A welcome improvement over the normal towels I used to take with me.
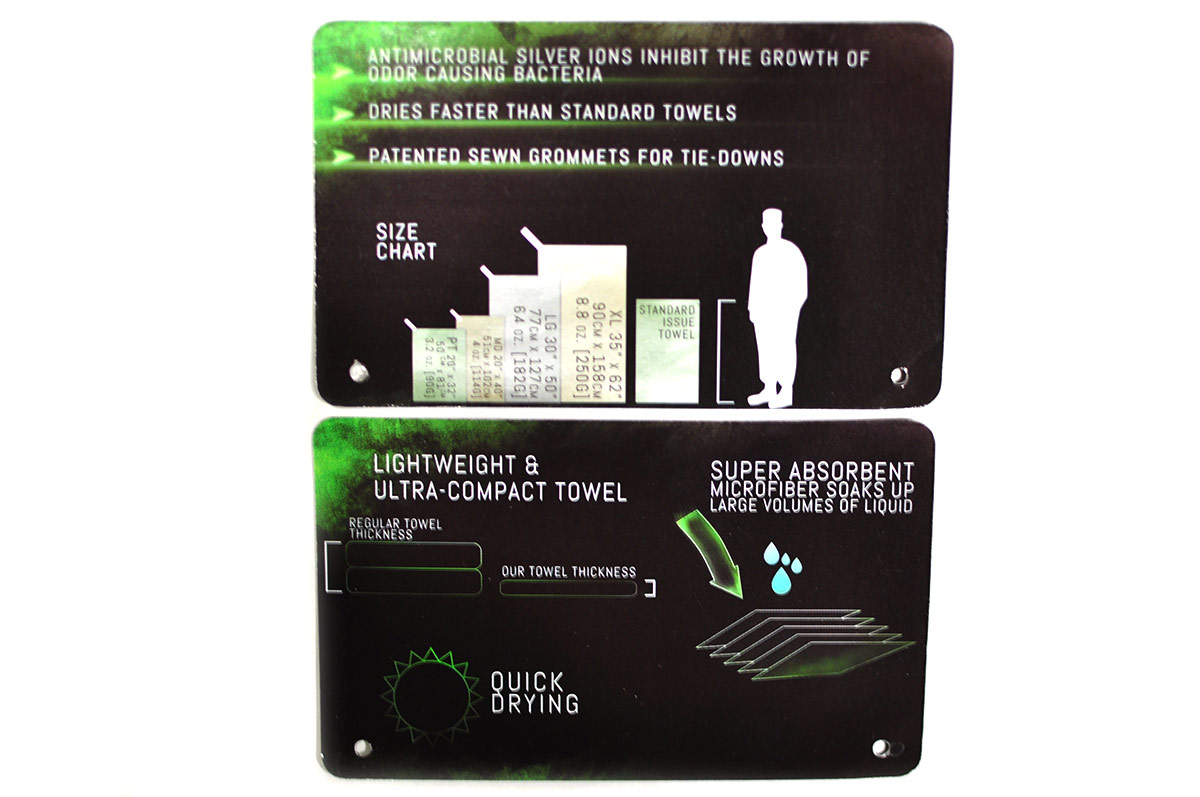
McNett also offers other various size towels, their information is listed below:
| Model | Size | Weight |
|---|---|---|
| PT | 20″ x 32″ (50cm x 81cm) | 3.2 oz (90g) |
| MD | 20″ x 40″ (50cm x 102cm) | 4.0 oz (114g) |
| LG | 20″ x 50″ (77cm x 127cm) | 6.4 oz (182g) |
| XL | 35″ x 62″ (90cm x 158cm) | 8.8 oz (250g) |
If you are interested in picking up one of these towels, just hit the buy now button below and it will take you to Amazon where you can get one.
Buy Now
No Such File or Directory: Exec of FILE Failed
I recently ran into the error “No Such File or Directory: Exec of FILE Failed” when trying to update a Perl script on a server running Apache.
The actual error message looked more like this.
No such file or directory: exec of 'script.cgi' failed
Premature end of script headers: script.cgi
A long story short, it turns out that the issue was line endings. Windows uses a standard CR+LF (Carriage Return + Line Feed) while Unix uses LF (Line Feed). We spotted this, after a lot of trying to figure what was going on, by running a “cat script.cgi” command on the server. When the content was displayed, every line was ended with a “^W”.
When using an application like WinSCP to copy the files to the server, the line endings are often converted during the copy process. But if you use an automated release process, or other process that doesn’t have the same features, you must manually convert the files to using Unix style line endings.
I converted the files using Notepad++. There are End-of-Line (EOL) conversion utilities built in. They can be accessed by going to Edit -> EOL Conversion after you have opened the offending file.
For some more information on how to convert the line endings in Unix, check out perltricks.com.
Once the line endings where converted from Windows to Unix style, everything worked as expected!
For some more information on line endings, check out Wikipedia, http://en.wikipedia.org/wiki/Newline.
