Quest For A Simple Twitter Feed

I’ve always wanted to be able to just slap a quick and simple twitter feed on to a site and could never find the code to really do it (I mean really simple, just show some tweets and be done with it).

Here is the basic solution that I came up with (end result image on the right).

Basically this consists of 3 parts, jQuery, a jQuery extension that I wrote (jquery-twitterfeed) and some CSS. Other than that, you don’t need much to make this work; and that was the point.

With the jQuery extension installed, you can put a Twitter feed anywhere on your page using some simple code. Basically a container for the tweets and a call to the extension.

<div id="twitter-feed">
	<span class="twitter-loading">Loading...</span>
	<img src="/images/ajax-loader-arrows.gif" alt="" />
</div>
$('#twitter-feed').twitterfeed({
	'user': 'santsys', /* Your User Name Here */
	'num': 10
});

The look and feel is almost exactly the same as the Twitter embedded tweet samples, just simplified down. This layout supports a minimum width of 300px, and that could be lowered with some minor tweaks to the layout. If you want more information on the Twitter APIs, check out the documentation here, https://dev.twitter.com/docs.

Below is the full set of CSS and the jQuery extension used to generate the tweets in the image on the right. Now available on GitHub, https://github.com/santsys/jquery-twitterfeed.

The css used to style the tweets. This uses a background image set from twitter directly.

.clear { clear: both; }
.tweet, .tweet a, .tweet span, .tweet div { font: normal normal normal 12px/16px "Helvetica Neue",Arial,sans-serif; color: #777; }
.tweet { padding: .25em; border: 1px solid #EEE; border-radius: 5px; max-width:500px; margin-bottom: .25em; min-width: 300px; }
.tweet .t-head a, .tweet .t-head a span { text-decoration: none; color: #333; line-height: 18px; }
.tweet .t-head .t-avatar { position: absolute; }
.tweet .t-head .t-avatar img { border-radius: 4px; }
.tweet .t-head .t-name { margin-left: 53px; margin-top: 8px; float: left; font-size: 16px; font-weight: bold; }
.tweet .t-head a:hover span.t-name { text-decoration: underline; }
.tweet .t-head .t-nickname { margin-left: 53px; float: left; clear: both; color: #999; font-size: 11px; }
.tweet .t-body { clear: both; margin-top: 55px; }
.tweet .t-content { color: #333; line-height: 18px; font-size: 14px; }
.tweet .t-content a { line-height: 18px; font-size: 14px; color: #2FC2EF; text-decoration: none; }
.tweet .t-content a:hover { text-decoration: underline; }
.tweet .t-foot { margin-top: 6px; }
.tweet .t-foot a.t-details { color: #777; text-decoration: none; }
.tweet .t-foot a:hover.t-details { color: #999; text-decoration: underline; }
.tweet .t-foot .t-actions { clear: both; float: right; margin: 0; padding: 0; }
.tweet .t-foot .t-actions li { float: left; list-style-type: none; list-style-position: outside; margin-left: .2em;}
.tweet .t-foot .t-actions li * { float: left; font-weight: normal; }
.tweet .t-foot .t-actions i { background: transparent url(https://platform.twitter.com/embed/sprite.png) no-repeat 0px 0px; } 
.tweet .t-foot .t-actions a, .tweet .t-foot .t-actions a b { color: #999; text-decoration: none; }
.tweet .t-foot .t-actions a:hover, .tweet .t-foot .t-actions a:hover b { color: #777; text-decoration: underline; }
.tweet .t-foot .t-actions a.t-reply i { background-position: 0 -30px; height: 13px; width: 18px; margin: 1px 5px 0 8px; } 
.tweet .t-foot .t-actions a.t-retweet i { background-position: 0 -48px; height: 13px; width: 22px; margin: 1px 5px 0 8px; } 
.tweet .t-foot .t-actions a.t-favorite i { background-position: 0 -66px; height: 15px; width: 16px; margin: 0 5px 0 8px; }
.tweet .t-foot .t-actions a:hover.t-reply i { background-position: -23px -30px; } 
.tweet .t-foot .t-actions a:hover.t-retweet i { background-position: -27px -48px; } 
.tweet .t-foot .t-actions a:hover.t-favorite i { background-position: -21px -66px; }

The jquery-twitterfeed.js jQuery extension that actually does the rendering, etc.

/*
	Twitter jQuery Feed
	Version 1.0
	By: Josh Santomieri (http://www.santsys.com/)

	Options:
		user - The twitter user
		num - The number of tweets to display

	Documentaion on the twitter feeds here:
	https://dev.twitter.com/docs/api/1/get/statuses/user_timeline
*/

(function ($) {
	jQuery.fn.twitterfeed = function (options) {
		var settings = $.extend({
			'user': '',
			'num': 10
		}, options);

		if (this.length <= 0) return;

		var _this = this;
		var _url = 'http://api.twitter.com/1/statuses/user_timeline.json';
		_url += '?screen_name=' + escape(settings.user);
		_url += '&count=' + settings.num;
		_url += '&exclude_replies=true';
		_url += '&callback=?';
		
		$.ajax({
			url: _url,
			type: 'GET',
			dataType: 'jsonp',
			crossDomain: true,
			cache: false,
			contentType: 'application/javascript',
			jsonpCallback: 'parseTwitterFeed',
			success: function (json) {
				if (json == null) {
					_this.text('No response from feed!');
				}
				else {

					if (json instanceof Array) {
						var html = '';
						var months = [
							"JAN", "FEB", "MAR",
							"APR", "MAY", "JUN",
							"JUL", "AUG", "SEP",
							"OCT", "NOV", "DEC"
						];

						for (var i = 0; i < json.length; i++) {
							var tweet = json[i];
							
							var date = new Date(tweet.created_at);
							var replyLink = 'https://twitter.com/intent/tweet';
							replyLink += '?in_reply_to=' + tweet.id;
							replyLink += '&tw_i=' + tweet.id;
							replyLink += '&tw_e=reply';
							replyLink += '&tw_p=tweetembed';
							replyLink += '&source=tweetembed';

							html += '<div class="tweet">';
							html += '<div class="t-head">';
							html += '<a href="https://twitter.com/' + tweet.user.screen_name + '">';
							html += '<span class="t-avatar"><img src="' + tweet.user.profile_image_url_https + '" alt="">';
							html += '<span class="t-name">' + tweet.user.name + '';
							html += '<span class="t-nickname">@<b>' + tweet.user.screen_name + '</b>';
							html += '';
							html += '';
							html += '<div class="t-body">';
							html += '<div class="t-content">' + parseTweet(tweet.text) + '</div>';
							html += '</div>';
							html += '<div class="t-foot">';
							html += '<a class="t-details" href="https://twitter.com/twitterapi/statuses/' + tweet.id + '">';
							html += '<span class="t-updated " title="' + date.toLocaleDateString() + '">';
							html += date.getDate() + ' ' + months[date.getMonth()] + ' ' + date.getFullYear().toString().substr(2, 2);
							html += '</span>' + result[0] + '');
			}

			rx = new RegExp("#[a-zA-Z0-9]+", "gi");
			while (result = rx.exec(text)) {
				out = out.replace(result[0], '<a href="https://twitter.com/search/?src=hash&q=' + escape(result[0]) + '">' + result[0] + '</a>');
			}

			return out;
		}
	};
})(jQuery);

Update – 9/5/2012
Twitter just released an updated set of code for embedded timelines, check it out here, https://dev.twitter.com/docs/embedded-timelines.

Public Link Feed: bitly + feedburner

I’ve been wanting a quick and simple way to get my public links from bitly to my site… something automatic that I wouldn’t have to mess with. 

I’ve done some searching, but couldn’t find anything that worked how I wanted it.

Bitly’s APIs offer a lot of basic options, but they are mostly around authenticated processes for users to login and see their content but there are not many ways for me to stream my content.

Bitly offers some basic methods such as http://bitly.com/u/santsys.json and http://bitly.com/u/santsys.rss to see my feed in JSON and RSS formats. The only problem is this causes a lot of JavaScript cross-site scripting issues if you want to integrate the information on your site. Especially because they don’t seem to support any JSONP functionality.

So the quick and dirty workaround I found was to load up the RSS feed into feedburner (http://feedburner.google.com) and use their JSONP API to load the data on my site.

There are some interesting lag times due to caching within feedburner. At the time of writing this, FeedBurner updates every 30 minutes. I have noticed it often takes much longer for the actual page feed to update. Possibly there are some other systems out there that might update more frequently?

Here is the basic code, and some simple usage samples (also in use on this blog, on the right side of the page titled “Links”).

/*
	Feedburner jQuery Feed
	Version 1.0
	By: Josh Santomieri (http://www.santsys.com/)

	Options:
		feedUrl 
			- The URL to your feed on feedburner, for example
			  http://feeds.feedburner.com/RecentBookmarksFromSantsysOnBitly.
		numLinks 
			- The number of links you want to be displayed.
		feedBurnerUrl 
			- The url for the feedburner API, currently
			  https://ajax.googleapis.com/ajax/services/feed/load.
		removeBitlyPlus 
			- If your feed pulls from Bitly, there will be '+' at the end of
			  the shortened URLs; set this to true to remove them.
		userIP 
			- If you want to set the user ip to send to feedburner, go for it.
			"Google is less likely to mistake requests for abuse when they include userip"

	Most of the documentation on the feedburner/Google APIs can be found here, 
	https://developers.google.com/feed/v1/jsondevguide
*/

(function ($) {
	jQuery.fn.feedBurn = function (options) {
		try {

			var settings = $.extend({
				'feedUrl' : 'http://feeds.feedburner.com/RecentBookmarksFromSantsysOnBitly',
				'numLinks': 10,
				'feedBurnerUrl': 'https://ajax.googleapis.com/ajax/services/feed/load',
				'removeBitlyPlus': true,
				'userIP' : ''
			}, options);

			var _feedUrl = settings.feedBurnerUrl;
			_feedUrl += '?q=' + settings.feedUrl;
			_feedUrl += '&amp;v=1.0';
			_feedUrl += '&amp;num=' + settings.numLinks;
			if (settings.userIP != null &amp;&amp; settings.userIP != '') {
				_feedUrl += '&amp;userip=' + settings.userIP;
			}
			_feedUrl += '&amp;callback=?';
			var container = this;

			$.ajax({
				url: _feedUrl,
				type: 'GET',
				dataType: 'jsonp',
				crossDomain: true,
				cache: false,
				jsonpCallback: 'parseFeed',
				success: function(json) {
					if (json == null) {
						container.text('Invalid response from server.');
					} else if (json.responseData == null) {
						container.text('Status Code: ' + json.responseStatus + '; Status: ' + json.responseDetails);
					}
					else {
						var links = json.responseData.feed.entries;
						var html = '';

						for (var i = 0; i &lt; links.length; i++) {
							var link = links[i];
							var linkHref = link.link;

							// Bitly adds a '+' to the end of the links so they open in a Bitly UI
							if (settings.removeBitlyPlus) {
								if (linkHref.charAt(linkHref.length - 1) == '+') {
									linkHref = linkHref.substring(0, linkHref.length - 1);
								}
							}

							html += '&lt;div class="feed-history"&gt;';
							html += '&lt;div class="feed-link"&gt;';
							html += '&lt;a href="' + linkHref + '" title="' + link.title + '"&gt;' + link.title + '&lt;/a>';
							html += '&lt;/div&gt;';
							html += '&lt;/div&gt;';
						}

						container.html(html);
					}
				}
			});
		}
		catch (e) { container.text(e); }
	};
})(jQuery);

And here is some sample usage code.

(function ($) {
	$(document).ready(function () {
		try {
			var options = {
				'numLinks': 6,
				'feedUrl': 'http://feeds.feedburner.com/RecentBookmarksFromSantsysOnBitly'
			};
			$("#bitly-feed div.side").feedBurn(options);
		}
		catch (e) { }
	});
})(jQuery);

Ruger Mark III Target

Specifications

Cat. #: MKIII512
Mod. #: 10101
Material: Alloy Steel
Finish: Blued
Barrel: Target
Barrel Length: 5.50″
Overall Length: 9.75″
Weight: 42.00 oz
Caliber: .22 LR
Capacity: 10
Grips: Checkered
Front Sight: Fixed
Rear Sight: Adjustable
Height: 5.50″
Width: 1.20″
Twist: 1:16″ RH
Grooves: 6

Read more

Burris AR-P.E.P.R. Mount (30mm)

Specifications

Weight: 8.7oz
Overall Length: 5.3125 in.
Ring Length: 4.125 in.
Ring Spacing: 2.1875 in.
Ring Width: 1.75 in.
Ring Length: 1 in.
Height: 1 in. (rail to bottom of ring)

General

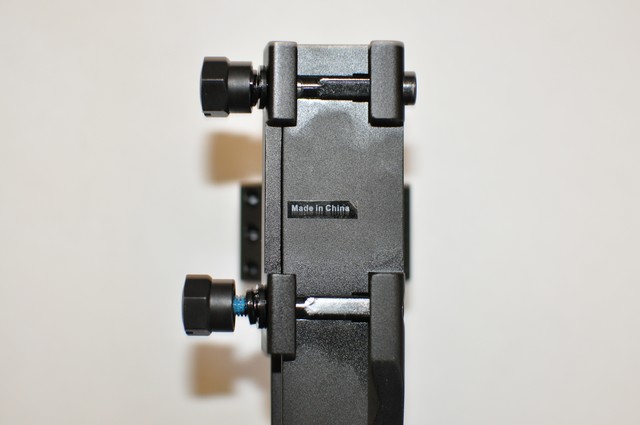
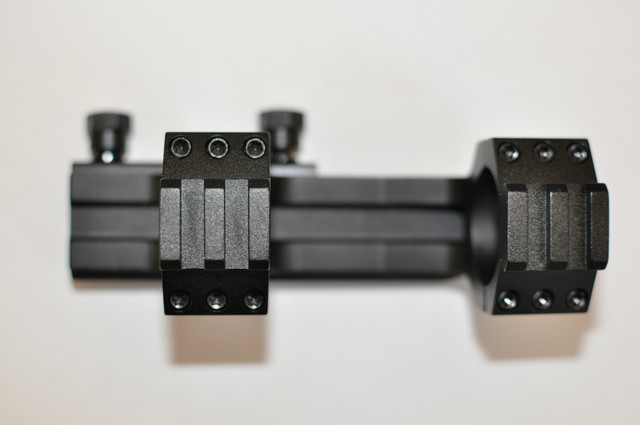
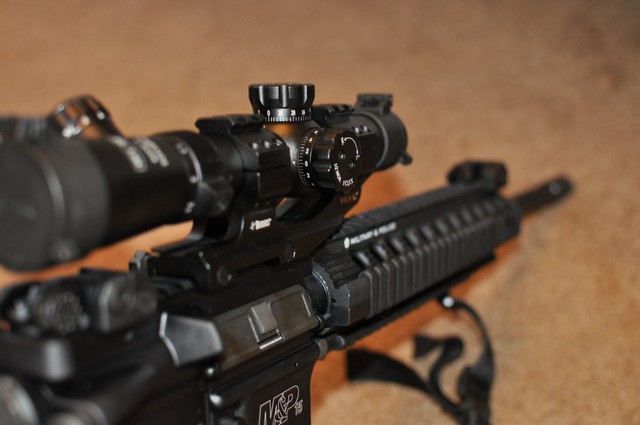
The Burris AR-P.E.P.R mount is sturdy and well constructed. The scope rings fit together quite well and are held down by 6 screws (3 on each side of the rings). Each ring also has a small (2 notch) Picantinny rail on the top. This will allow for the attaching of additional accessories above your scope.

The 1 in height of the mount will help many standard tactical style, low magnification scopes to clear a fold down rear site. And the forward offset of the scope allows for good eye relief on most short stalk weapons.

The only gripe that I might possibly have with this mount is the “Made in China” sticker it comes with.

Leatherwood CMR 1-4x24mm

Specifications

Power: 1x to 4x (variable)
Objective Lense Dia: 24mm
Eye Relief: Minimum 3 in.
Overall Length: 10.2 in.
Weight: 16.5 oz.
Windage/Elevation Adjustments: 0.5 MOA
Battery Type: CR2032 (3V)

Unboxing

In the box, the Leatherwood CMR scope comes with the basics… A short user’s manual, an Allan wrench for adjusting the “ZRO-LOK” turret system, a cleaning cloth, 2x CR2032 Batteries, and a set of flip-up covers.

General

The overall feel of the scope is good; it has a nice weight to it and feels durable. All of the adjusters have firm indexing, so you can tell when you are tuning them; and they require a bit of force to actual make the adjustments.

The ZRO-LOC system allows you to lock the “zero” of the scope, and then make positive adjustments from that point of zero. It’s an interesting concept, but it will require some more messing with before I can say if it’s a good thing or a bad thing.

Adjusting the power of the scope through the 1x – 4x range is smooth and easy using the power ring. There is a nub that sticks out, so it is easily adjusted without actually having to look at the adjustment, i.e. while looking down the scope.

The clarity of the scope seems to be the same throughout the power ranges, however I did need to make some tweaks to the focus going from very close (1x @ 5 yds) to far away (4x @ ~100 yds). I was able to find a happy medium where near and far were clear, but it took a bit of tweaking.

On quick shouldering of my rifle, I did notice that I needed to be looking straight through the scope to avoid losing sight picture. It doesn’t function well from strange shooting angles (something that an EOTech works great for). In theory, this could be an issue for shooting off hand or from extreme or contorted positions.

The illumination of the reticle is controlled by a dial on the eye piece. There are 11 brightness settings. NV (night vision), 2 – 11, and an Off position. You can rotate the dial both directions, allowing you to go directly to either end of the brightness spectrum.

Reticle

The reticle is interesting; I’m not completely sold on it. A lot of the elements are quite small and if you are in a quick aim situation, it could be hard to locate the parts you need. However with that said, operating in more of the scope perspective, the reticle is nice and contains some great drop and lead information.

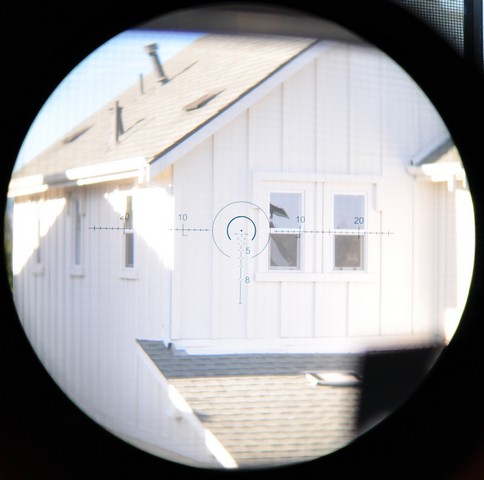
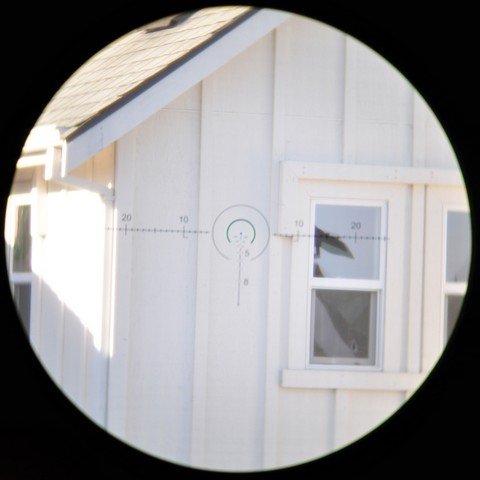
The illumination of the reticle is pretty bright, especially for lower light situations. It washes out in bright light (outside, etc.) but the black reticle is still quite visible and clear. The illumination is definitely much better suited for indoors or dark/jungle type areas. Also, with the green illumination, the reticle does not wash out and is visible on all surfaces that I tested in lower light. In direct sun, the black reticle is visible and seems to function as any other scope would in the same situation. The below pictures show the reticle; The 1st is the illuminated reticle inside, the 2nd and 3rd is the illuminated reticle outside.

The reticle is only accurate at the highest magnification setting (4x) so to do any range estimation you must be in that setting. However because the turrets are tuned in MOA, adjustments at any magnification should be accurate. Also using the bullet drop indicators should work at any magnification as well.

The bullet drop indicator is set for either .223 (5.56mm NATO) 62 grain or .308 (7.62mm NATO) 168 grain ammunition. Included in the instructions is a basic ballistics chart containing ranging and drop information.

Here are some samples of the magnification of the scope, the 1st pictures is at 1x, the 2nd is at 4x.

Viking Tactics (VTAC) Padded Sling Review

I recently purchased the Viking Tactics (VTAC) padded sling from Bravo Company USA. This was my first purchase from them and everything went very smoothly. I will definitely use them in the future.

You can also get it here.

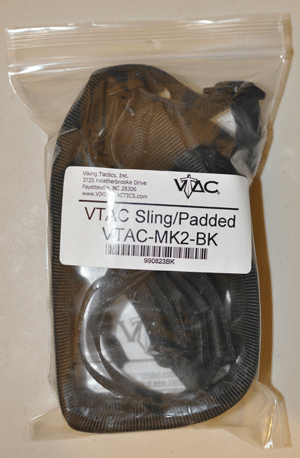
The sling is packaged in no-frills packaging (a plastic zip-loc bag). Included was the sling and a simple one page set of instructions on how to attach and use the sling.

Upon removing the sling from its packaging, the first thing that I noticed is the sling feels to be constructed very well and made of quality materials. The padded portion of the sling is connected to the main strap with multiple levels of stitching and appears to be very durable. The padding feels to be made of a high-quality foam (or foam like material) and is about 1/4″ thick and 2″ wide.

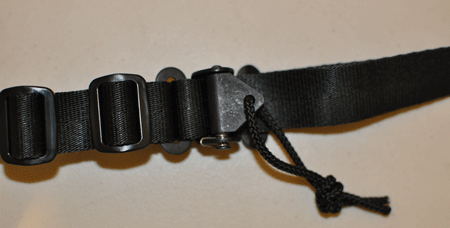
The sling does not come with any swivels, but can be attached to pretty much any swivel that will handle a standard 1″ wide strap. The sling is attached to the swivels by two plastic strap adjusters. Though the adjusters are plastic, they feel to be very dense and strong plastic and it does not appear that they will break under normal usage conditions.

The sling is equipped with a quick release buckle that allows for quick tightening of the sling by simply pulling on the loose end of the sling, and quick extension by simply pulling on the buckle lanyard. The quick release buckle is made out of metal and has a relatively strong return spring so it will stay tight and not slip while moving.

On my first use of the sling, I needed to cinch it up pretty tight as it’s designed to fit different size people with different amounts of gear, etc. So using it wearing just a t-shirt, you end up with a pretty long tail out of the quick release. But that is nothing that a quick extra piece of Velcro or a ruber band won’t fix.

Specifications

Model #: VTAC-MK2-BK
Length: 60in. / 1.52m (Fully Extended)
Construction: Cloth strap with a mix of plastic and metal components

Viking Tactical also has a demonstration video for how to use the sling.

Update: 11/21/2013

I’ve been using the VTAC sling for quite some time now; and figured it was worth doing an update… The sling has performed great, I’ve run it through many shooting classes, and drug it around all over the place and had no issues with form or function. I have it setup so I can use my AR-15 with the strong or weak hand, and it all just works. The only gripe that I have is with the sizing (length) of the sling. If I’m not wearing full kit (plate carrier + chest rig + mags + etc.) even with the sling fully cinched up there is still a little too much slack for my taste. I have a relatively small frame, but if you are less than 160lbs and don’t plan on wearing full kit, be prepared for this sling to not hold the gun against you very tight. It’s generally not a problem, but, it can get annoying if you are trying to do something while the gun is slung over you (it ends up flopping around a lot). So just something to be conscious of.

Midwest Heavy Duty QD Front Sling Adaptor

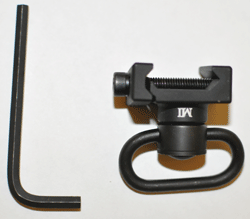
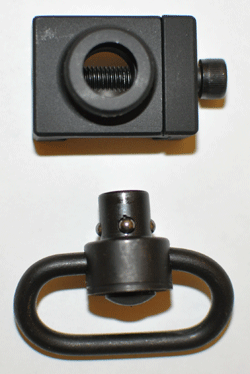
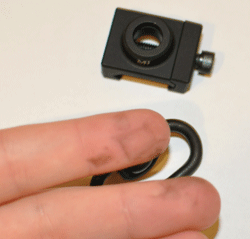
The Midwest Industries Heavy Duty front swivel, upon first impression, is definitely heavy duty. It has weight to it, and at its thinnest point is 1/8 in thick.

The swivel is detachable via push button and also has turn locks to limit rotation. This is a huge help with keeping your sling from getting twisted up. The one thing that I did notice about the swivel is that the bluing (or whatever they used to make the metal black) appears to stick to things and come off. It appears to just be excess coating, as rubbing it does not cause you to get to bare metal, but I did need to wipe the parts off a bit to keep it from turning everything that touched it black.

Specifications

SKU #: MCTAR-08HD
Description: Detachable heavy duty front sling swivel
Rail Type: Picatinny
Dimensions: 1.125in (L) X 0.875in (W) X 1.125in (H)
mi-hd-swivel-001mi-hd-swivel-002mi-hd-swivel-003mi-hd-swivel-004